Part One: Fund Your Wallet with Gas
If you already have a Circle developer-controlled wallet on Polygon Amoy with Testnet MATIC, proceed to part two. If you haven’t created a developer-controlled wallet, head to our quickstart Create Your First Developer-Controlled Wallet guide. Once completed, jump into steps one and two below to acquire gas for deploying your first contract.1. Acquire Tokens for Gas Fees
In Web3, refers to transaction fees that are always paid in the native currency of the blockchain network. For example, to deploy a contract on a contract on the Ethereum network, you must pay the transaction fee in Ether (ETH). Similarly, on the Polygon network, the fee would be in MATIC. To ensure smooth transactions, it is important to have a sufficient amount of the native token in your wallet. To gather tokens for gas, we recommend using the Polygon . When you visit the faucet’s website, you will be prompted to provide your wallet’s address. To acquire it, make a request toGET /wallets as
shown below noting down Wallet One’s address wallets[0].address.
Response Body
2. Check the Wallet’s Balance
Before deploying the contract, double-check the MATIC tokens were received. This can be done by making a request toGET /wallets/{id}/balances
providing the ID of Wallet One from the previous step.
Response Body
Part Two: Write and Deploy Smart Contract
3. Writing the Smart Contract
OpenZeppelinThis tutorial will use OpenZeppelin’s Contract Wizard to generate an ERC-721
smart contract. OpenZeppelin offers a secure smart contract development
library - built on top of a foundation of community-vetted code.The Contract Wizard includes:
- Implementations of standards like ERC-20 and ERC-721.
- Flexible role-based permissions scheme.
- Reusable Solidity components to build custom contracts and complex decentralized systems.
- Select the ERC-721 template and the additional features you want to add to your contract.
- Select Mintable. By default, this selects the Ownable access control,
restricting the
safeMintfunction to the wallet owner.
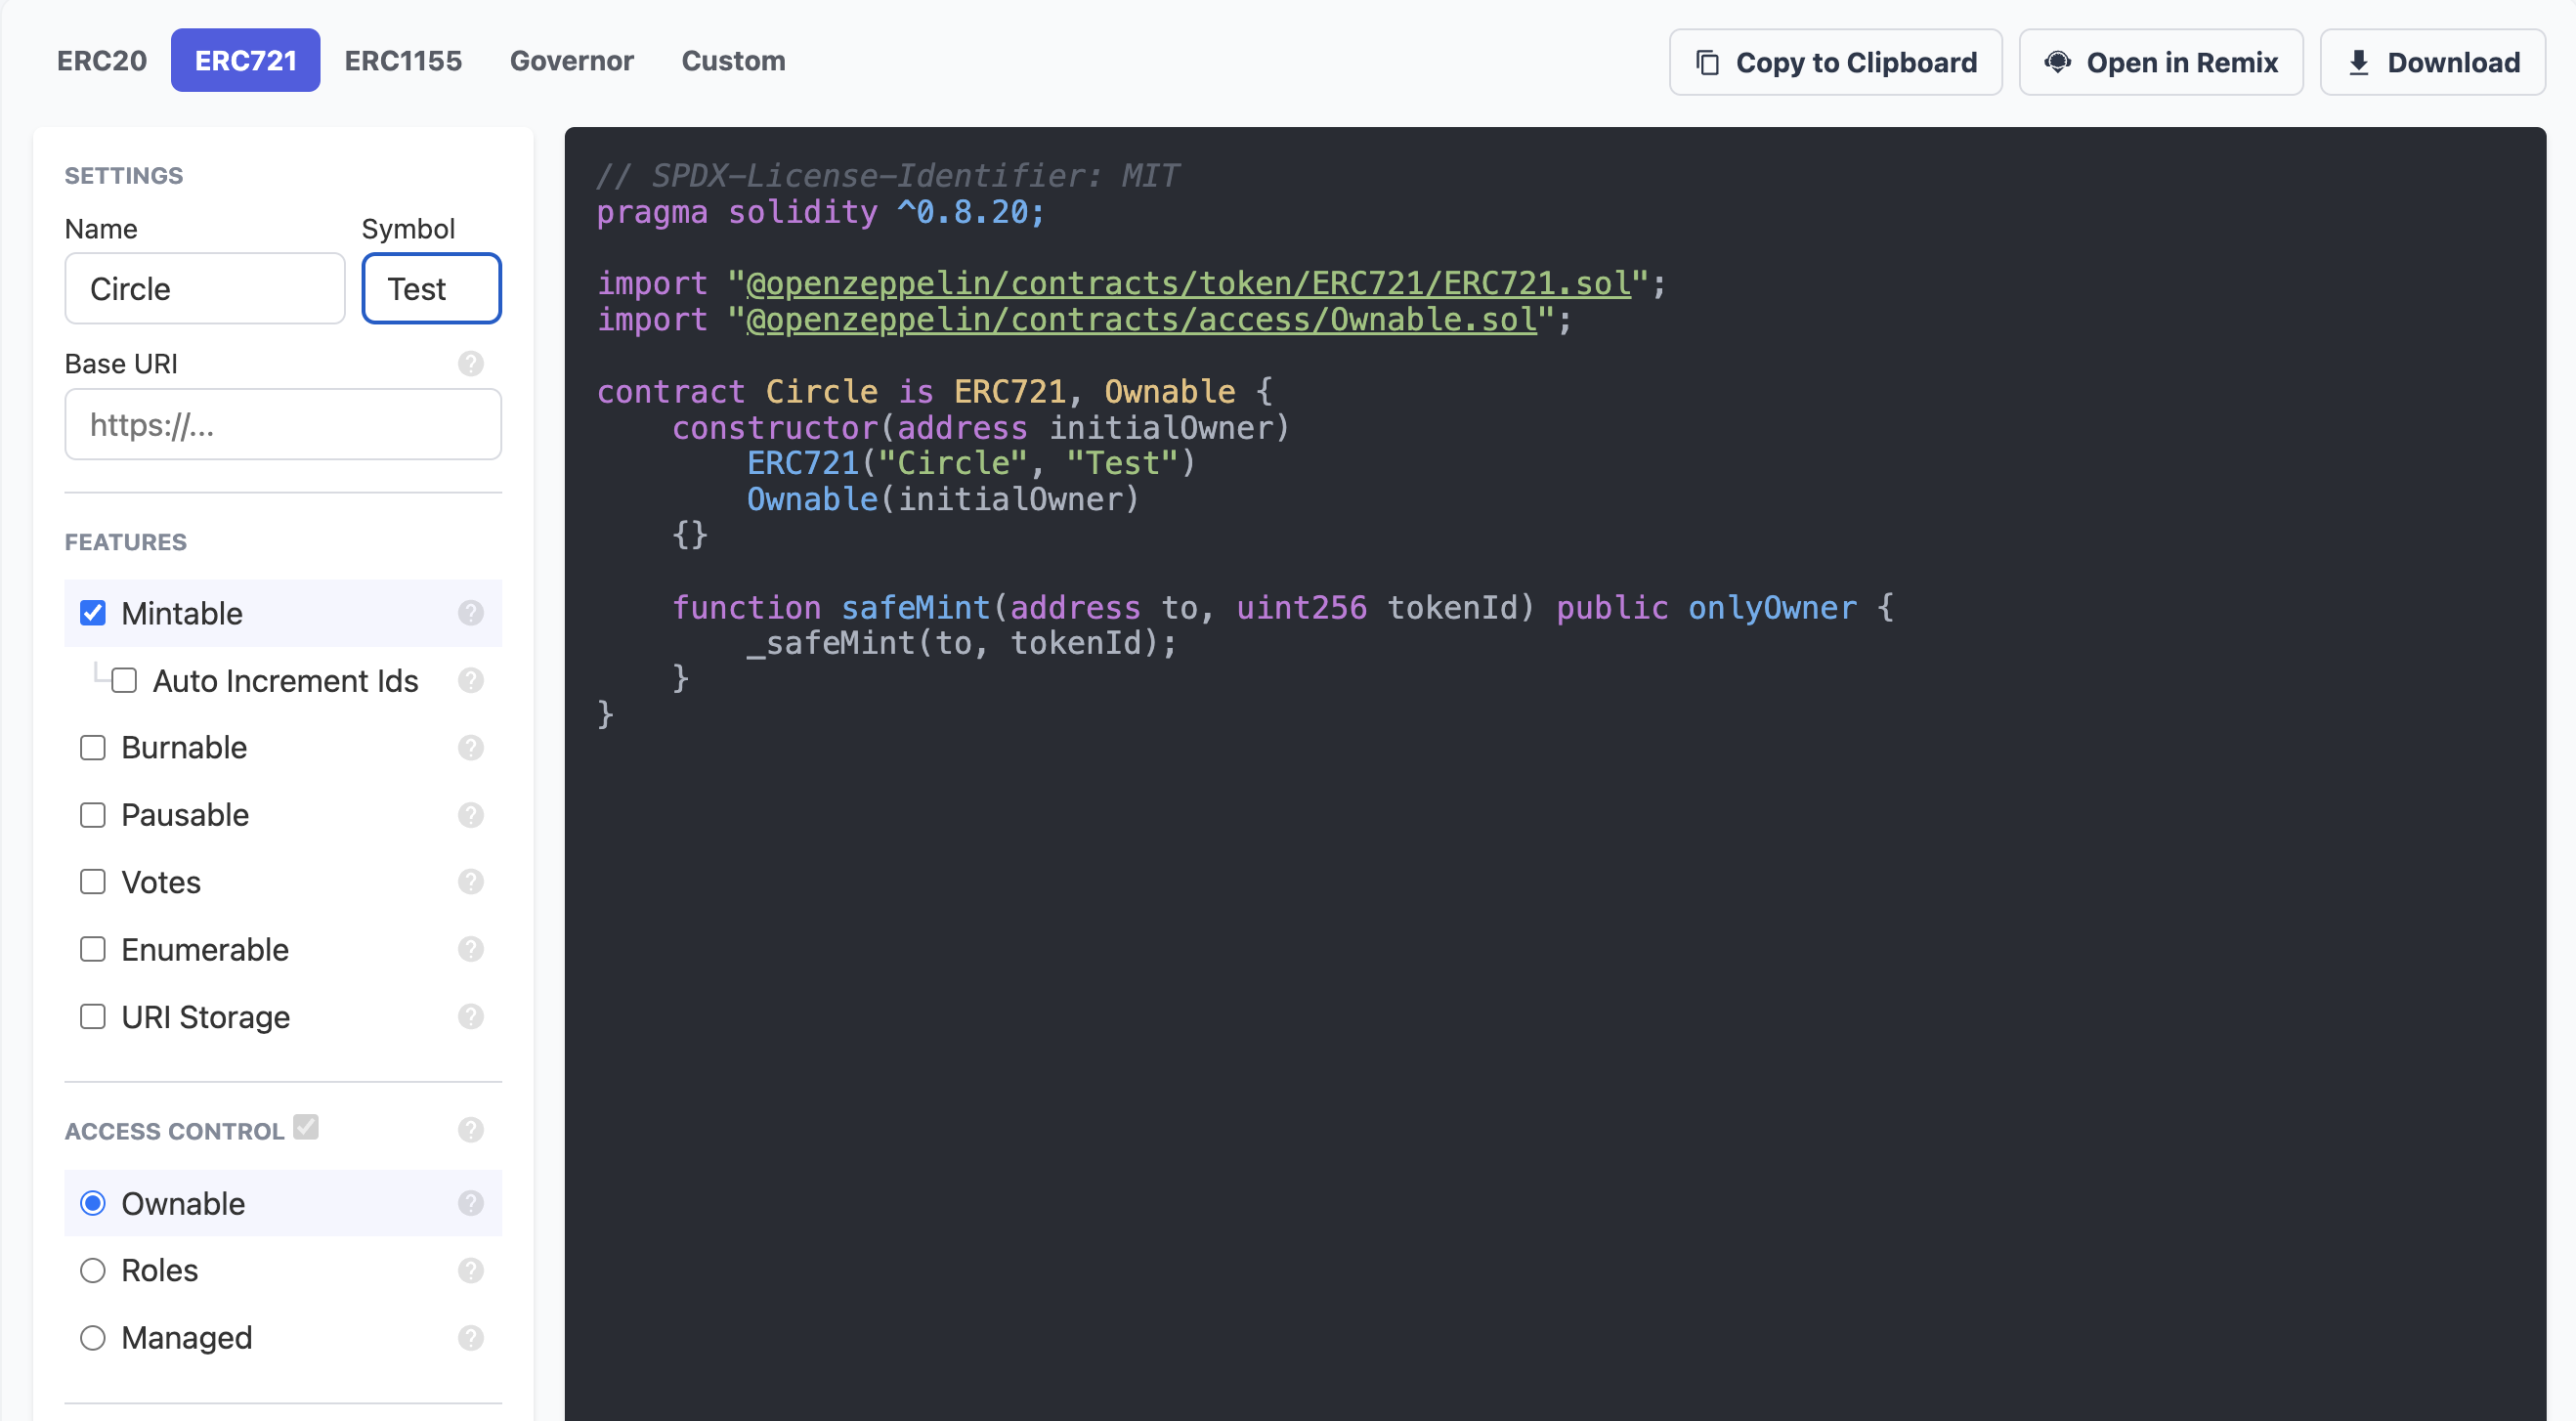
- Select Open in Remix button to create a new workspace in Remix and compile the contract.
-
Select Compile contract to compile the Solidity code into bytecode for
the Ethereum Virtual Machine (EVM). We recommend using the default compiler
settings which are appropriate for most use cases.
- In Remix, you don’t need to update the code at all.
- If you don’t see compile contract, ensure you are in the Solidity Compiler section. If not, select it in the left-hand navigation bar.
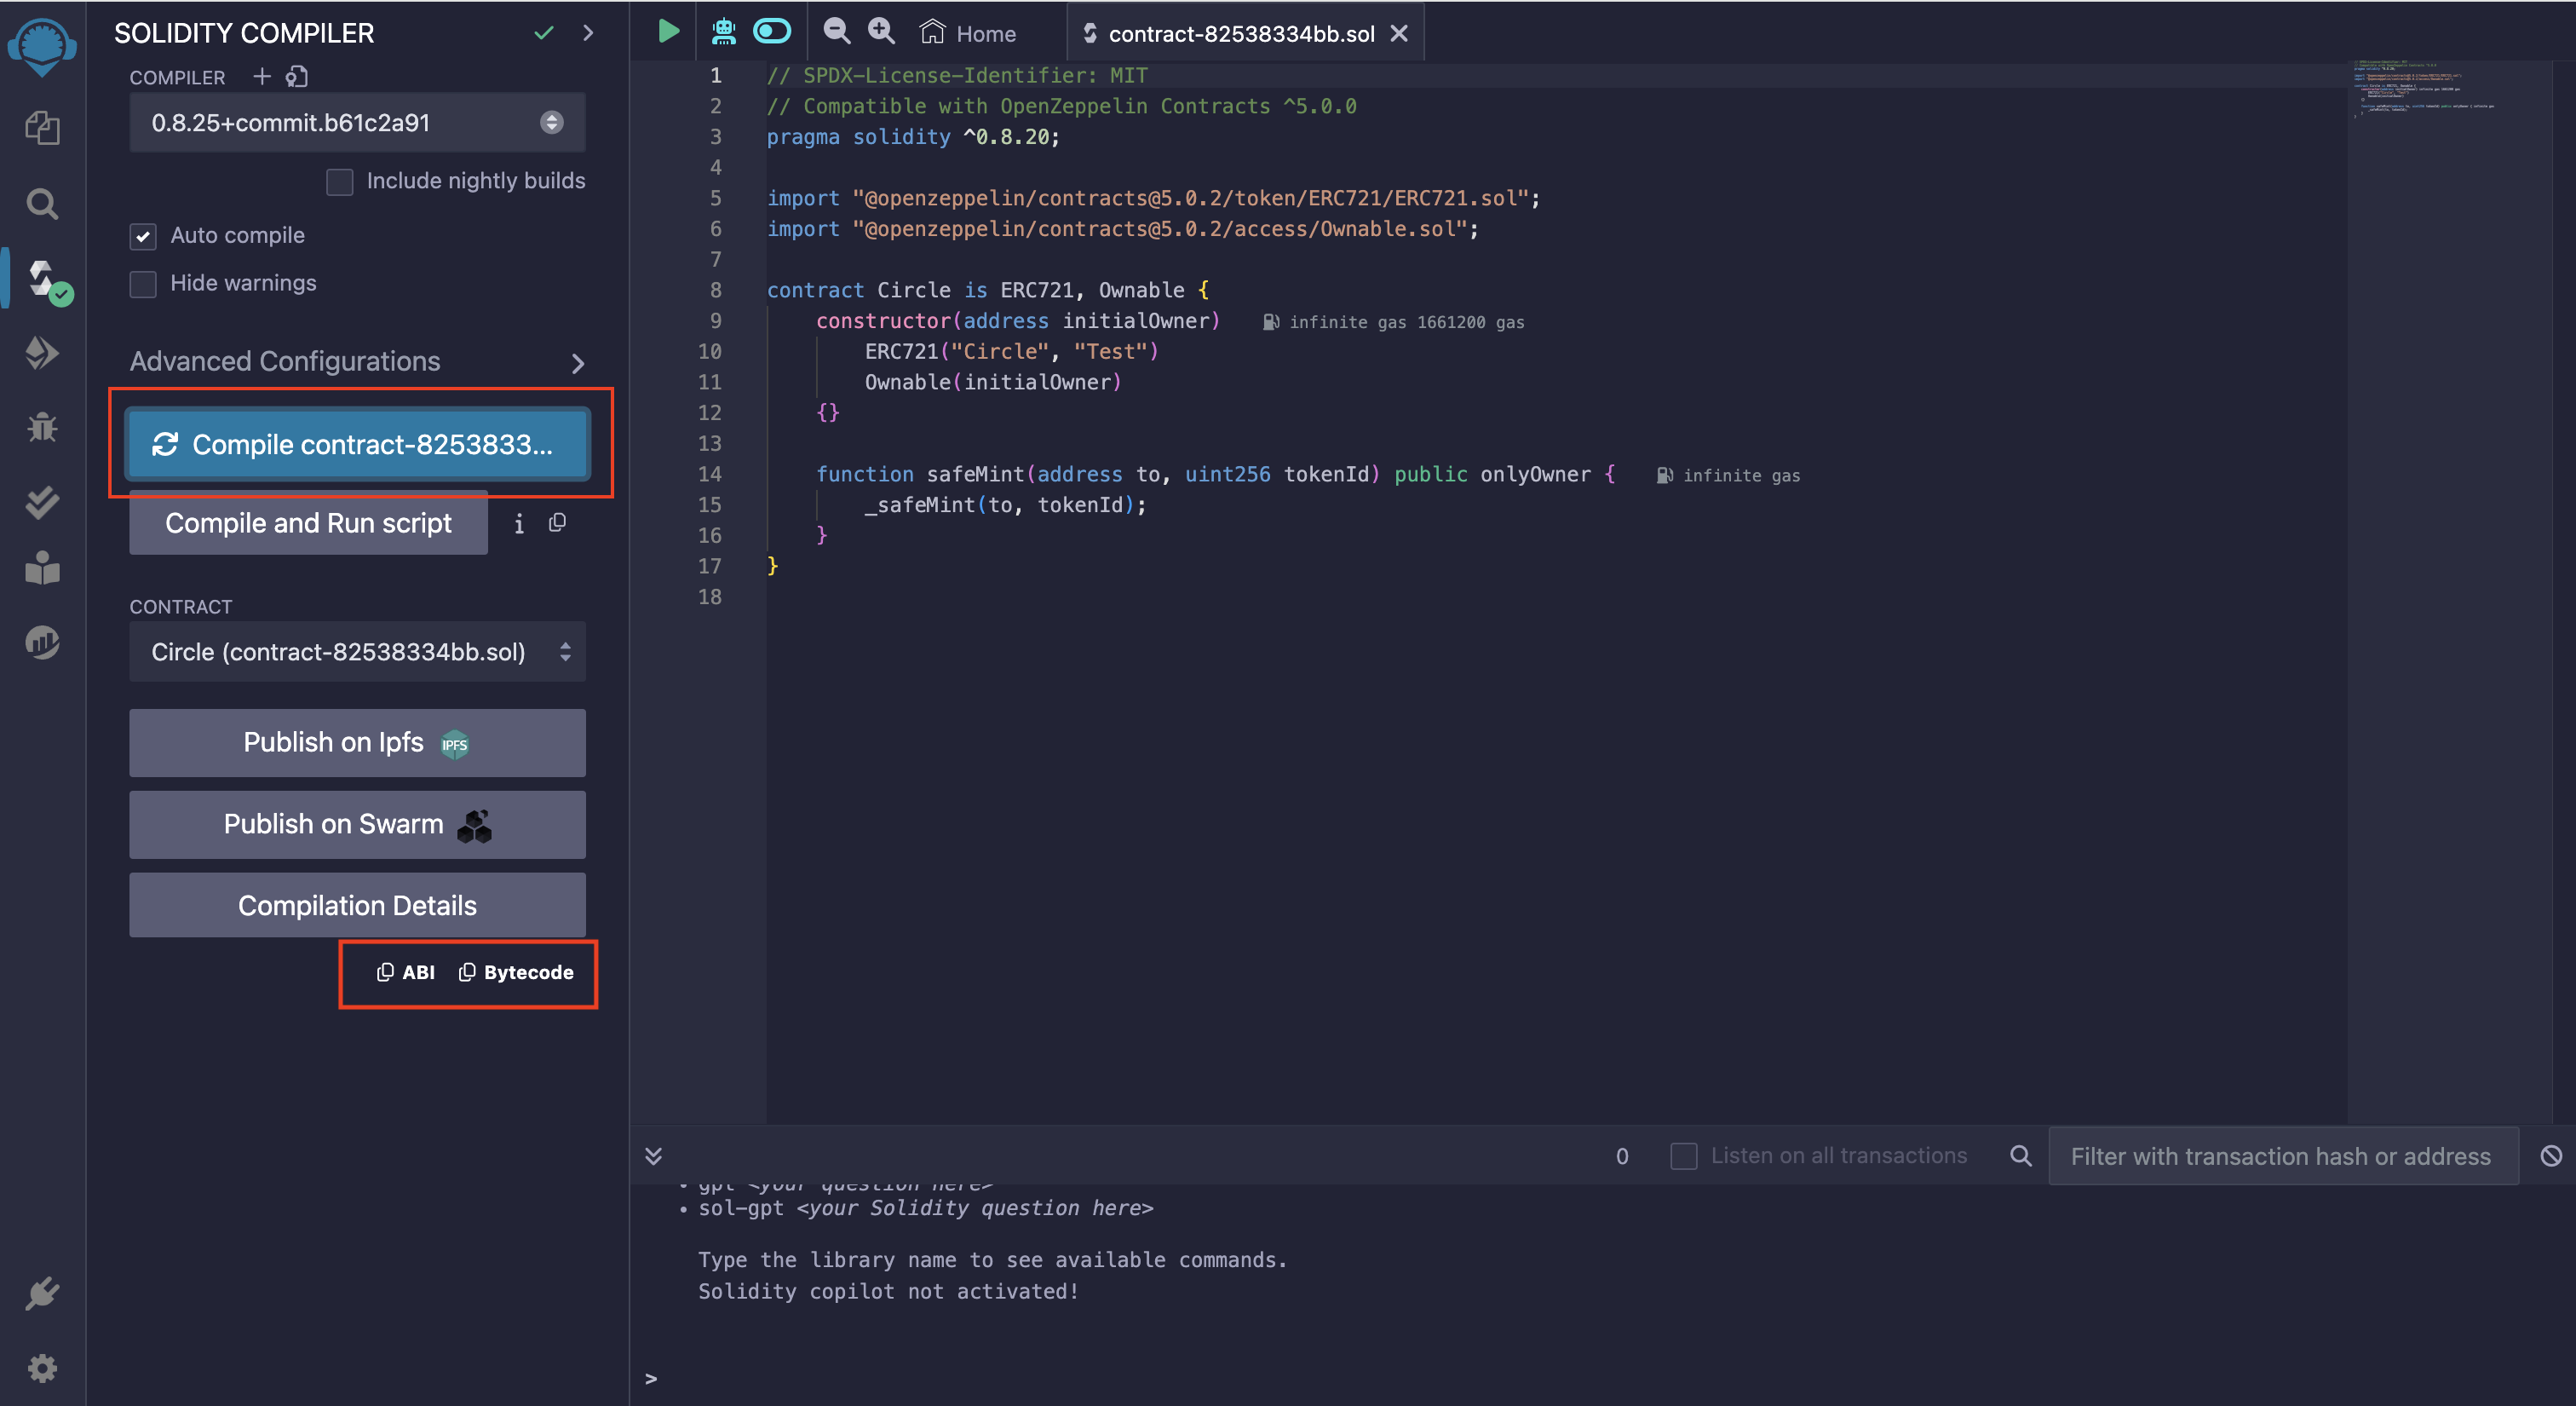
- Once the compilation is complete, note down the ABI and bytecode. These
values will be used in the next step.
- The compiler output is available under Compilation Details. For more information on the Solidity compiler’s outputs, see using the compiler.
- The Application Binary Interface (ABI) is the standard way to interact with contracts on an EVM from outside the blockchain and for contract-to-contract interaction.
4. Deploy the Smart Contract
To deploy a smart contract, we will use thePOST /contracts/deploy
method. In the request body, you will provide the following values gathered from
the prior steps:
entitySecretCiphertextuniquely generated . To learn more about generating the ciphertext for this request, see the guide How to Re-Encrypt the Entity Secret.walletIdacquired from step 1. This is the identifier of your wallet on a specific blockchain.abiJSONacquired from the Solidity compiler in step 3.bytecodeacquired from the Solidity compiler in step 3.constructorParametersthe address to set as the initial owner of the contract. For this guide, it should be the address of your wallet, but it can be any address.
Common Syntax Errors
abiJSONmust be stringified i.e. quote escaped. To stringfy the JSON you can use the JsonFormatter’s Stringfy tool.bytecodemust be prefixed with0x.
transactionId and a contractId
in the response.
Response Body
GET /contracts/{id}
to check the status of your transaction. When the transaction has been confirmed
on-chain, the contract response object will contain the contractAddress and
have a status of PENDING. After 12 block confirmations, the contract will have
a status of COMPLETE - as seen below.
JSON
contractAddress.