> ## Documentation Index
> Fetch the complete documentation index at: https://circle-devdocs-test-ai-codegen-component.mintlify.site/llms.txt
> Use this file to discover all available pages before exploring further.
# Manage Team Members
> Use the Developer Console to add, remove, and update team members
The Circle developer console lets you create and add additional users to your
developer account to seamlessly collaborate with your teammates. As an Admin,
you can easily assign only the necessary permissions each user needs by
assigning them a user role. Each role has distinct permissions and access
levels, letting you set the least permissive access policies for your team
members in a streamlined developer process.
## User Roles
The console displays two roles. You can choose one of the following supported
roles:
1. **Owner (Admin):** When you create a developer account, you are automatically
assigned an Admin role. As an owner, you will have all the same permissions
as an Admin, except that this user cannot be removed, and their role cannot
be modified. It is highly recommended that a person of significant control
has this role. The person of significant control can be modified by
contacting customer support.
2. **Admin:** Administrators have full control and can perform all actions
within the console, including adding and managing users, updating admin
settings, managing API keys, and using Contracts in the developer console.
3. **View-only:** These users have limited permissions and may only edit their
personal account information. They can view almost everything in the console
(see the permissions table below for more details), but they cannot make any
changes or perform any actions within the console. This role is ideal for
team members who need access to the account for observation or reporting
purposes but do not need editing capabilities.
## Roles and Feature Permissions
| Feature | Admin | View-only |
| -------------------------------- | :----: | :---------: |
| Upgrade to Mainnet | Edit | Not visible |
| Toggle Between Testnet & Mainnet | Edit | Edit |
| API Keys | Edit | View |
| API Logs | View\* | View |
| Webhooks | Edit | View |
| Webhook Logs | View\* | View |
| **Wallets** | — | — |
| Overview | View\* | View |
| **Wallets: User-Controlled** | — | — |
| Dashboard | View\* | View |
| Configurator | View\* | Not visible |
| Users | View\* | View |
| Transactions | View\* | View |
| **Wallets: Dev-Controlled** | — | — |
| Dashboard | View\* | View |
| Configurator | View\* | Not visible |
| Wallets | View\* | View |
| Transactions | View\* | View |
| **Smart Contracts** | — | — |
| Contracts | Edit | View |
| Templates | Edit | View |
| Console Wallets | Edit | View |
| **Gas Station** | — | — |
| Paymasters | Edit | View |
| **Personal Settings** | — | — |
| My Account | Edit | Edit |
| **Account Settings** | — | — |
| Team (User Management) | Edit | Not visible |
| Billing | Edit | Not visible |
| Payment Methods | Edit | Not visible |
\*For some capabilities, the console supports only View access. You can't edit
settings for these features.
## Manage users on the Developer Console
As an admin user, you can add and remove users, and update user roles. This
allows you to maintain control over access and permissions for your team
members. Use the steps in the following sections to manage users:
* [Add a user](#add-a-user): Learn how to add a new user to your account in the
developer console.
* [Remove a user](#remove-a-user): Find out how to remove a user from your
account via the developer console.
* [Update user roles](#update-user-roles): Discover how to modify the roles and
permissions assigned to a user.
## Add a user
### 1. Navigate to admin settings
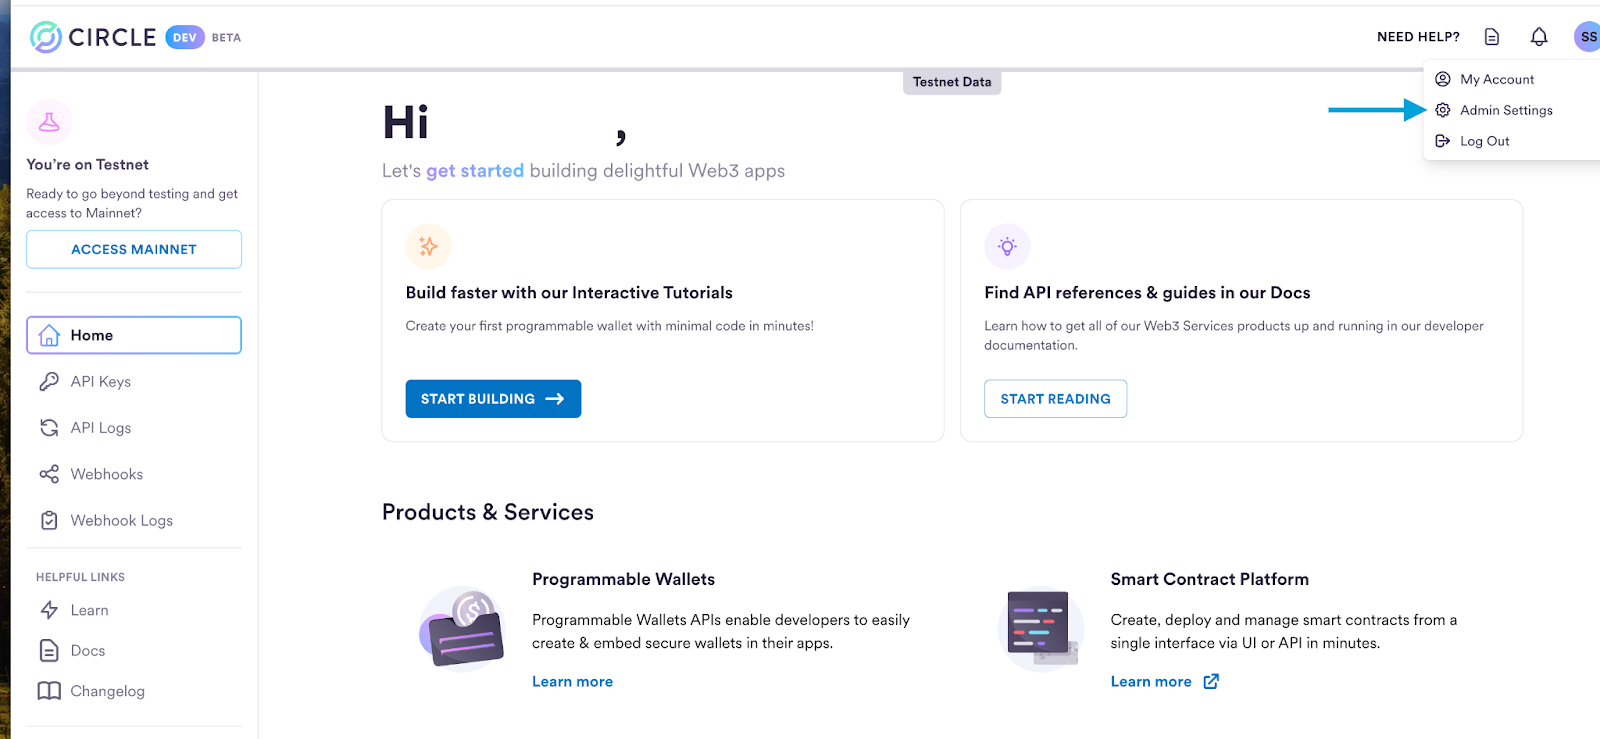
Log in using an Admin account. To add more users, click your profile icon in the
top-right corner of the page and select **Admin Settings** from the dropdown
menu.
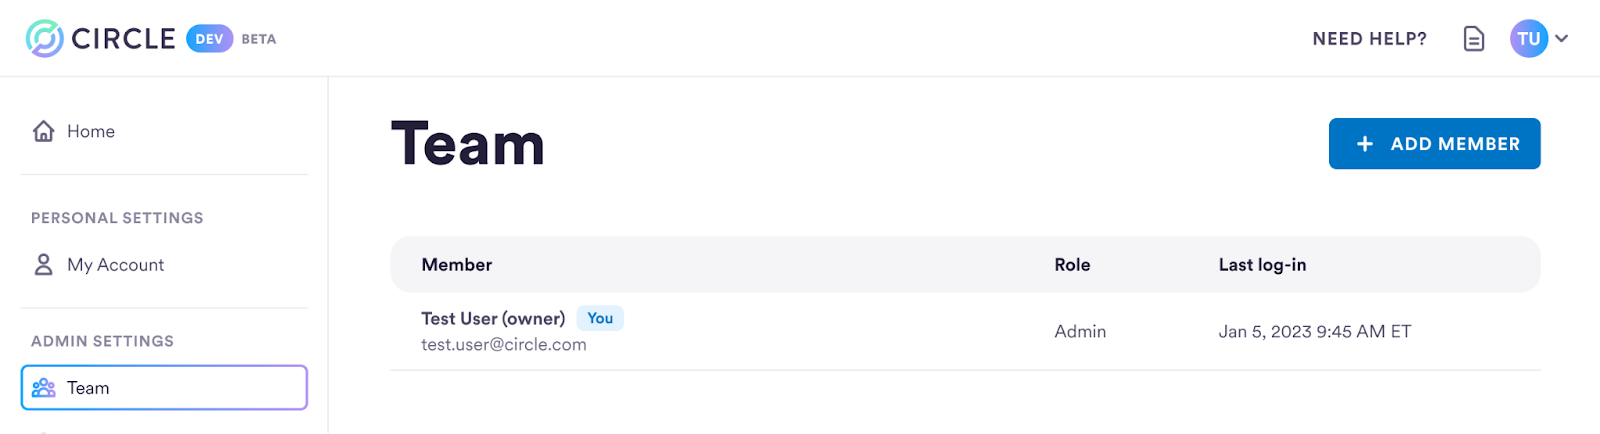
 ### 2. Open add member modal
Select **Add Member** to begin the invitation process.
### 2. Open add member modal
Select **Add Member** to begin the invitation process.
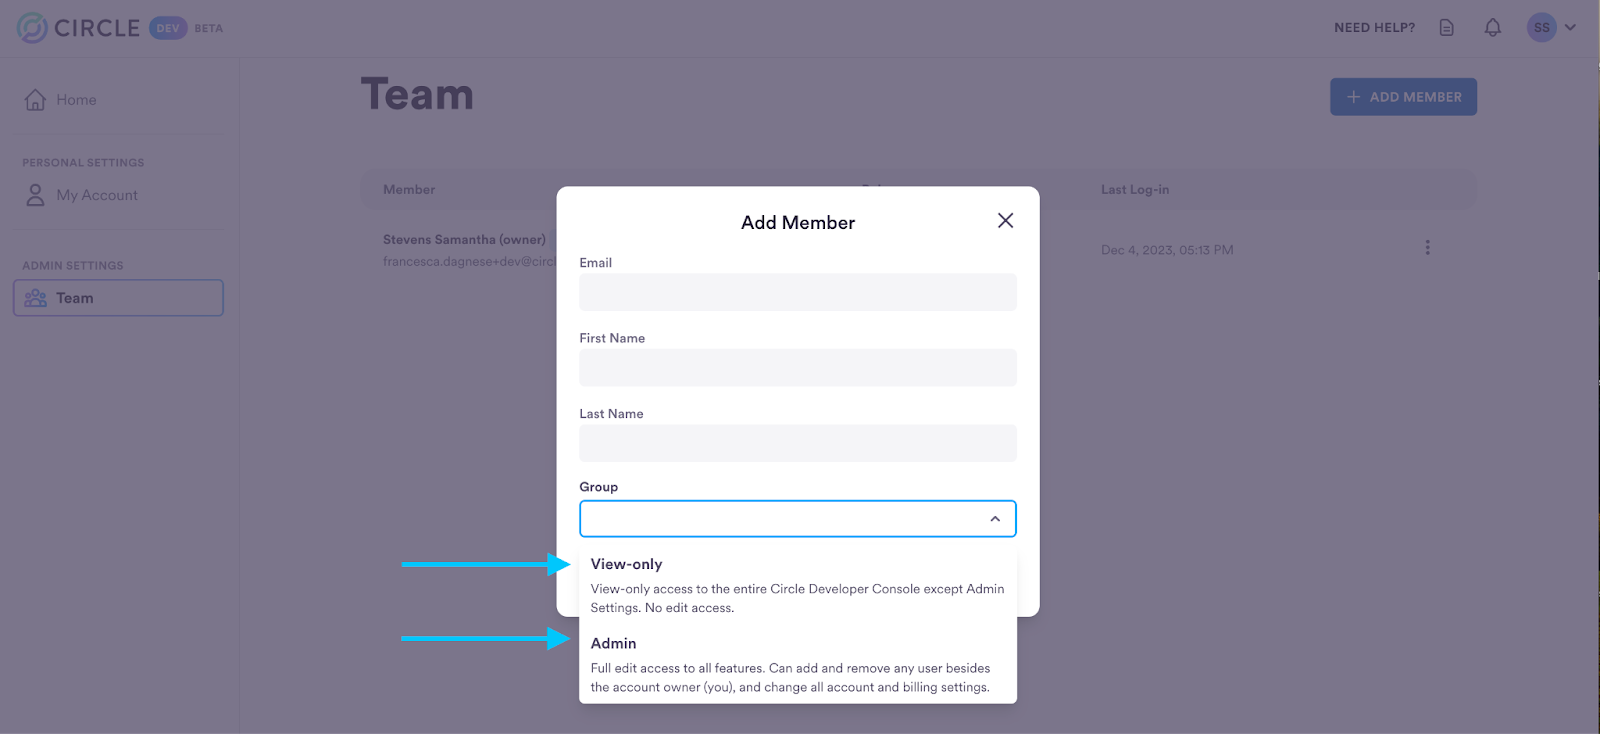
 ### 3. Add member details
Enter the new user information, including **email address, first name**, and
**last name**. Select **View-only** or **Admin** to set the new user's
permissions. Select **Send Invite**.
**Email addresses must be unique across accounts**
An email address that is invited must be unique across Circle accounts. If you
invite an email used on another developer or Circle Mint account the user will
not be able to successfully join your team.A common workaround to this issue
is resolved by using plus addressing. To do this, append a plus ("+") sign and
any combination of words or numbers after your email address For example, if
my email were [testuser@email.com](mailto:testuser@email.com) I would use the
email address [testuser+1@email.com](mailto:testuser+1@email.com), and I would
still receive emails to my original email account. Google Workspace and
Microsoft 365 support plus addressing. If you do not use one of these
providers, please check with your email hosting provider before using it.
### 3. Add member details
Enter the new user information, including **email address, first name**, and
**last name**. Select **View-only** or **Admin** to set the new user's
permissions. Select **Send Invite**.
**Email addresses must be unique across accounts**
An email address that is invited must be unique across Circle accounts. If you
invite an email used on another developer or Circle Mint account the user will
not be able to successfully join your team.A common workaround to this issue
is resolved by using plus addressing. To do this, append a plus ("+") sign and
any combination of words or numbers after your email address For example, if
my email were [testuser@email.com](mailto:testuser@email.com) I would use the
email address [testuser+1@email.com](mailto:testuser+1@email.com), and I would
still receive emails to my original email account. Google Workspace and
Microsoft 365 support plus addressing. If you do not use one of these
providers, please check with your email hosting provider before using it.
 ### 4. User accepts invitation
The user will receive an email invitation to join your team. Email invitations
will expire 7 days after they are issued. An Admin can resend an invitation from
the Team page as needed.
They should follow the steps below to join:
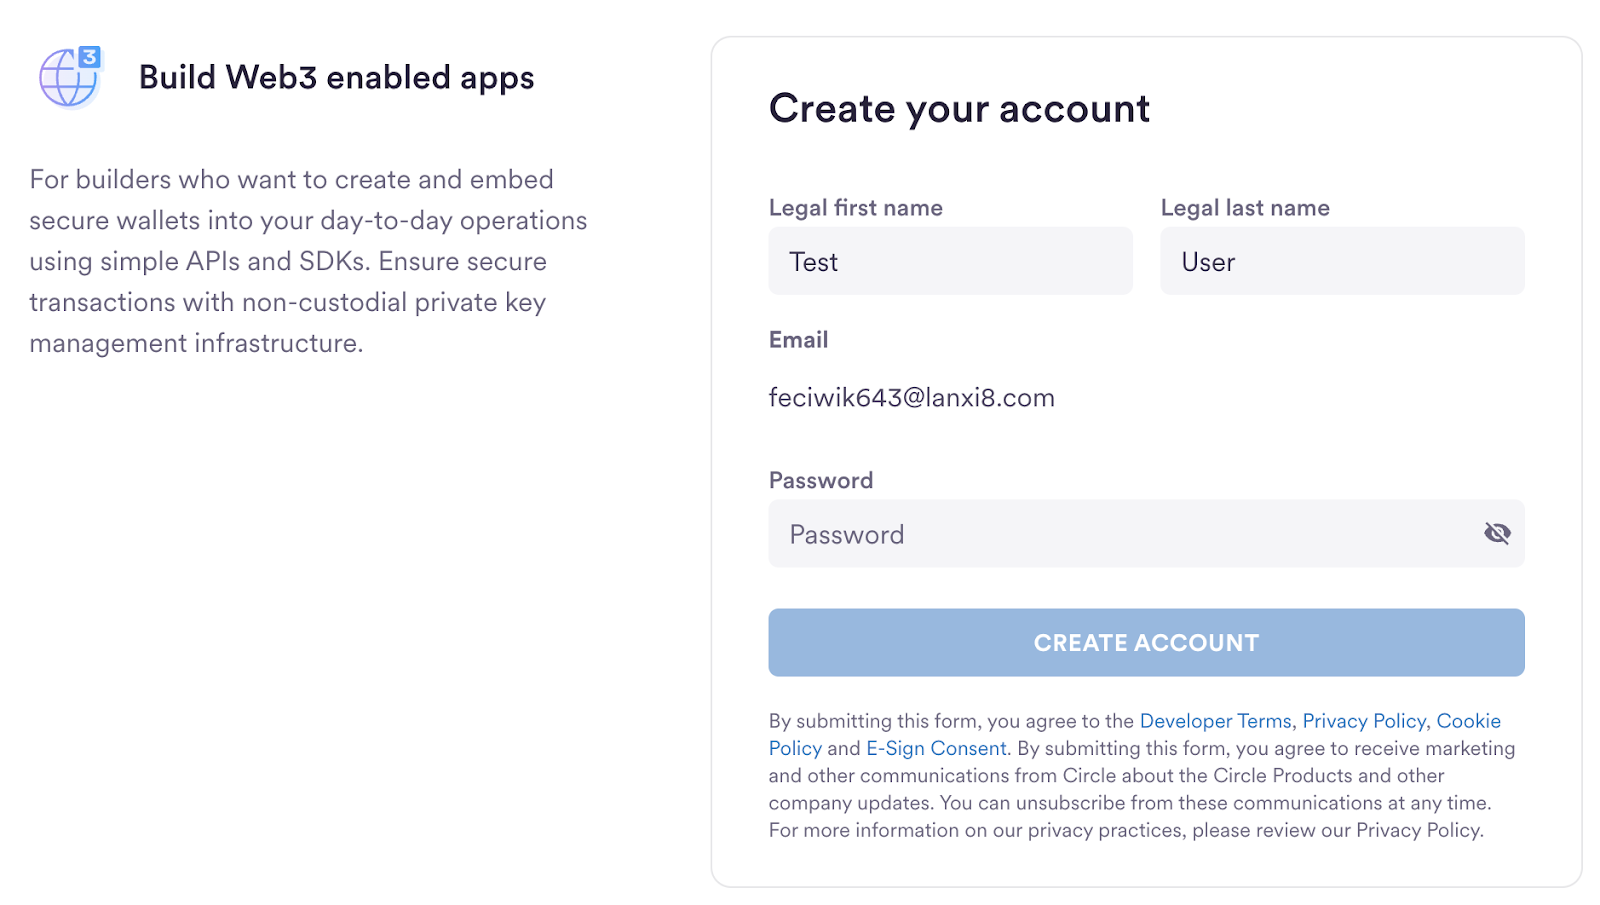
1. Open the email invitation and locate the **Join Our Team** button. Click on
it to proceed.
2. They will be directed to the sign-up form and will be required to review
their **legal first name**, **legal last name,** and provide a **password**.
3. After filling out the form, click on the **Create Account** button to create
your account.
4. Once the user successfully creates their account, they will be granted access
to the developer console in your shared account.
### 4. User accepts invitation
The user will receive an email invitation to join your team. Email invitations
will expire 7 days after they are issued. An Admin can resend an invitation from
the Team page as needed.
They should follow the steps below to join:
1. Open the email invitation and locate the **Join Our Team** button. Click on
it to proceed.
2. They will be directed to the sign-up form and will be required to review
their **legal first name**, **legal last name,** and provide a **password**.
3. After filling out the form, click on the **Create Account** button to create
your account.
4. Once the user successfully creates their account, they will be granted access
to the developer console in your shared account.
 ## Remove a user
### 1. Navigate to admin settings
Navigate to **Admin Settings** from the profile dropdown menu.
### 2. Select remove member
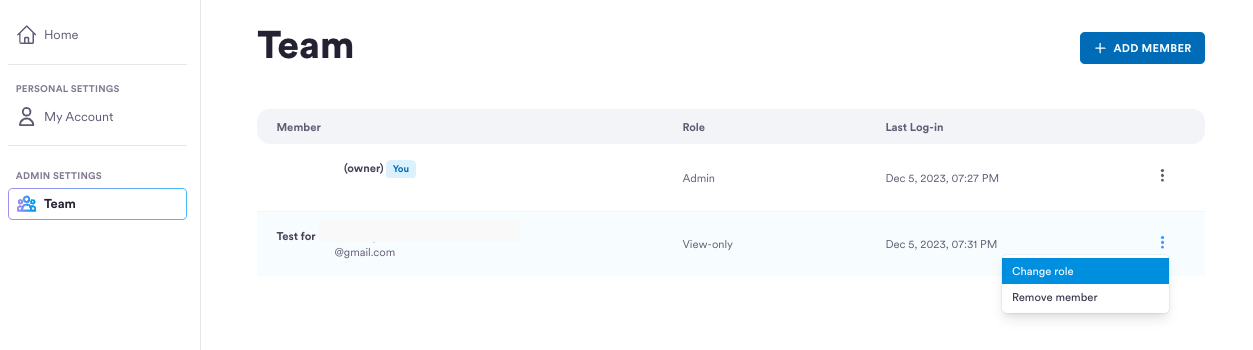
Select the three dots to view the different actions. Select **Remove member** to
remove this user from the account.
## Remove a user
### 1. Navigate to admin settings
Navigate to **Admin Settings** from the profile dropdown menu.
### 2. Select remove member
Select the three dots to view the different actions. Select **Remove member** to
remove this user from the account.
 ### 3. Confirm removal of user
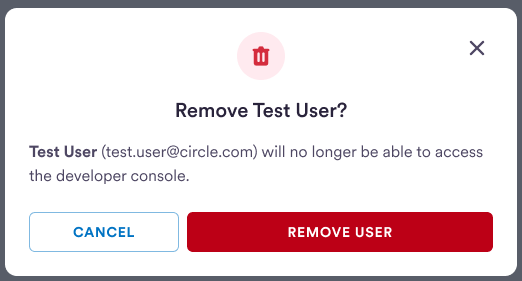
Confirm that you want to remove this user by selecting **Remove user**. This
action will disable the user information and permissions in the developer
console.
### 3. Confirm removal of user
Confirm that you want to remove this user by selecting **Remove user**. This
action will disable the user information and permissions in the developer
console.
 ## Update user roles
### 1. Select change role
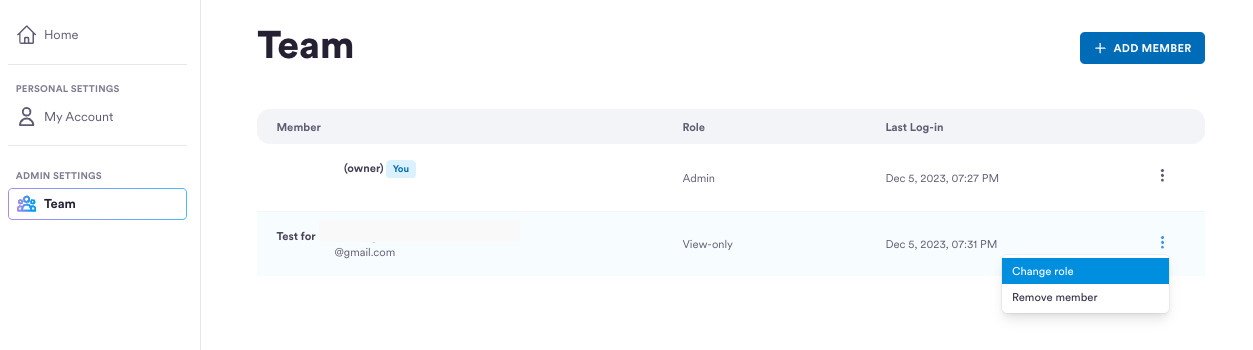
From the **Admin Settings** screen, select the three dots next to the user whose
permissions you want to change and select **Change role**.
## Update user roles
### 1. Select change role
From the **Admin Settings** screen, select the three dots next to the user whose
permissions you want to change and select **Change role**.
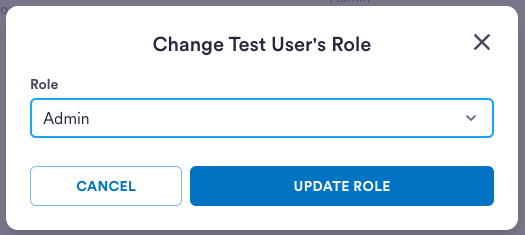
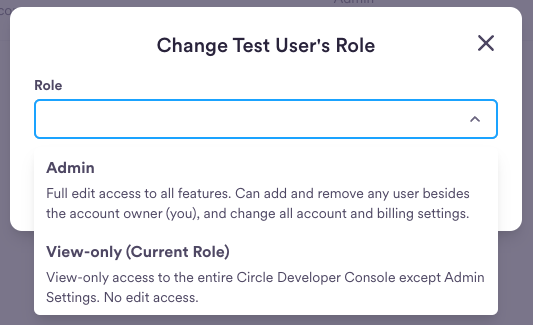
 ### 2. Select new role
Select the new role from the dropdown menu.
### 2. Select new role
Select the new role from the dropdown menu.
 ### 3. Confirm the new role of the user
Confirm the new role for the user by selecting **Update Role.**
### 3. Confirm the new role of the user
Confirm the new role for the user by selecting **Update Role.**