> ## Documentation Index
> Fetch the complete documentation index at: https://circle-devdocs-test-ai-codegen-component.mintlify.site/llms.txt
> Use this file to discover all available pages before exploring further.
# Circle Developer Account
The Circle Developer account allows you to manage your use of Circle's Developer
Services, such as your Wallets activity.
Watch this video to learn how to sign up for a developer account and
familiarize yourself with the Circle's developer dashboard.
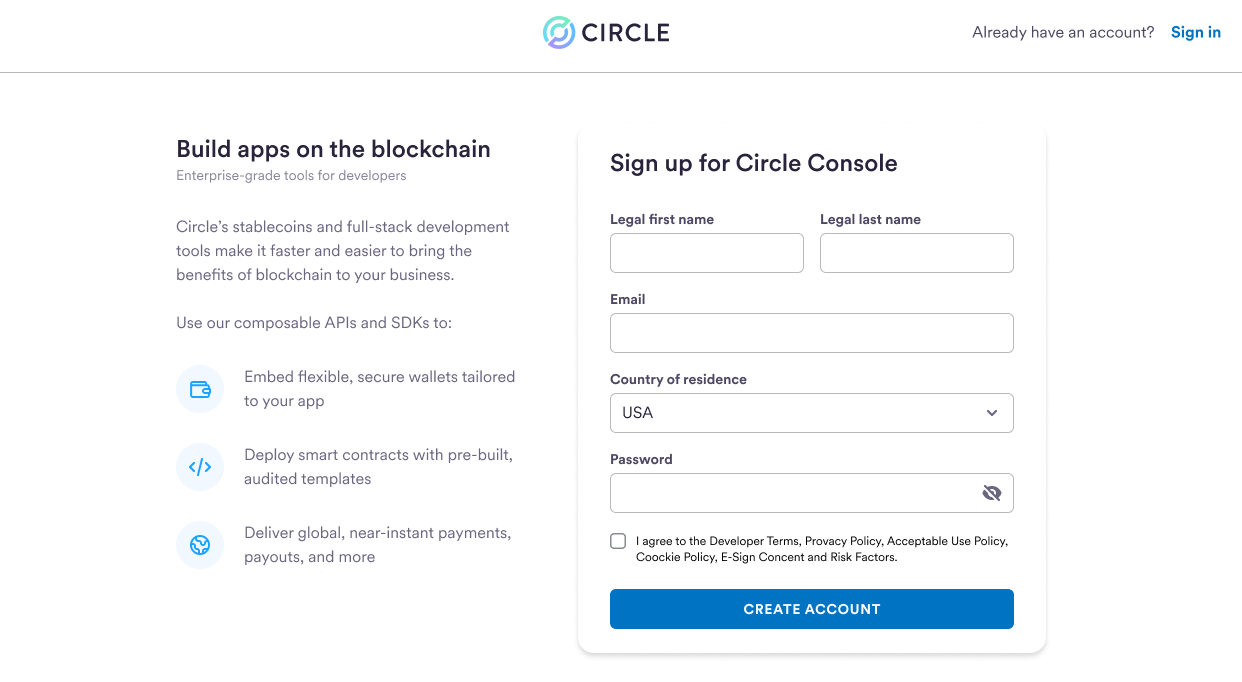
## Sign Up for a Developer Account
Sign up for the Circle Developer dashboard here:
[console.circle.com/signup](https://console.circle.com/signup).
Within the Circle Developer account, you can create and update
[API keys and client keys](/w3s/web3-services-api-client-keys-auth),
[subscribe for activity notifications](/wallets/webhook-notifications), view
your API logs, and more! Anyone can sign up for a Circle Developer account
within minutes. All you need is your name, email, and password!
 ## Creating an API Key for Developer Services
To learn more about Circle’s API keys and authentication, refer to the guide on
[API Keys and Client Keys](/w3s/web3-services-api-client-keys-auth).
Perform the steps below to create and register an **API key** from the Circle
Developer account.
1. Sign up with your email address at:
[console.circle.com/signup](https://console.circle.com/signup)
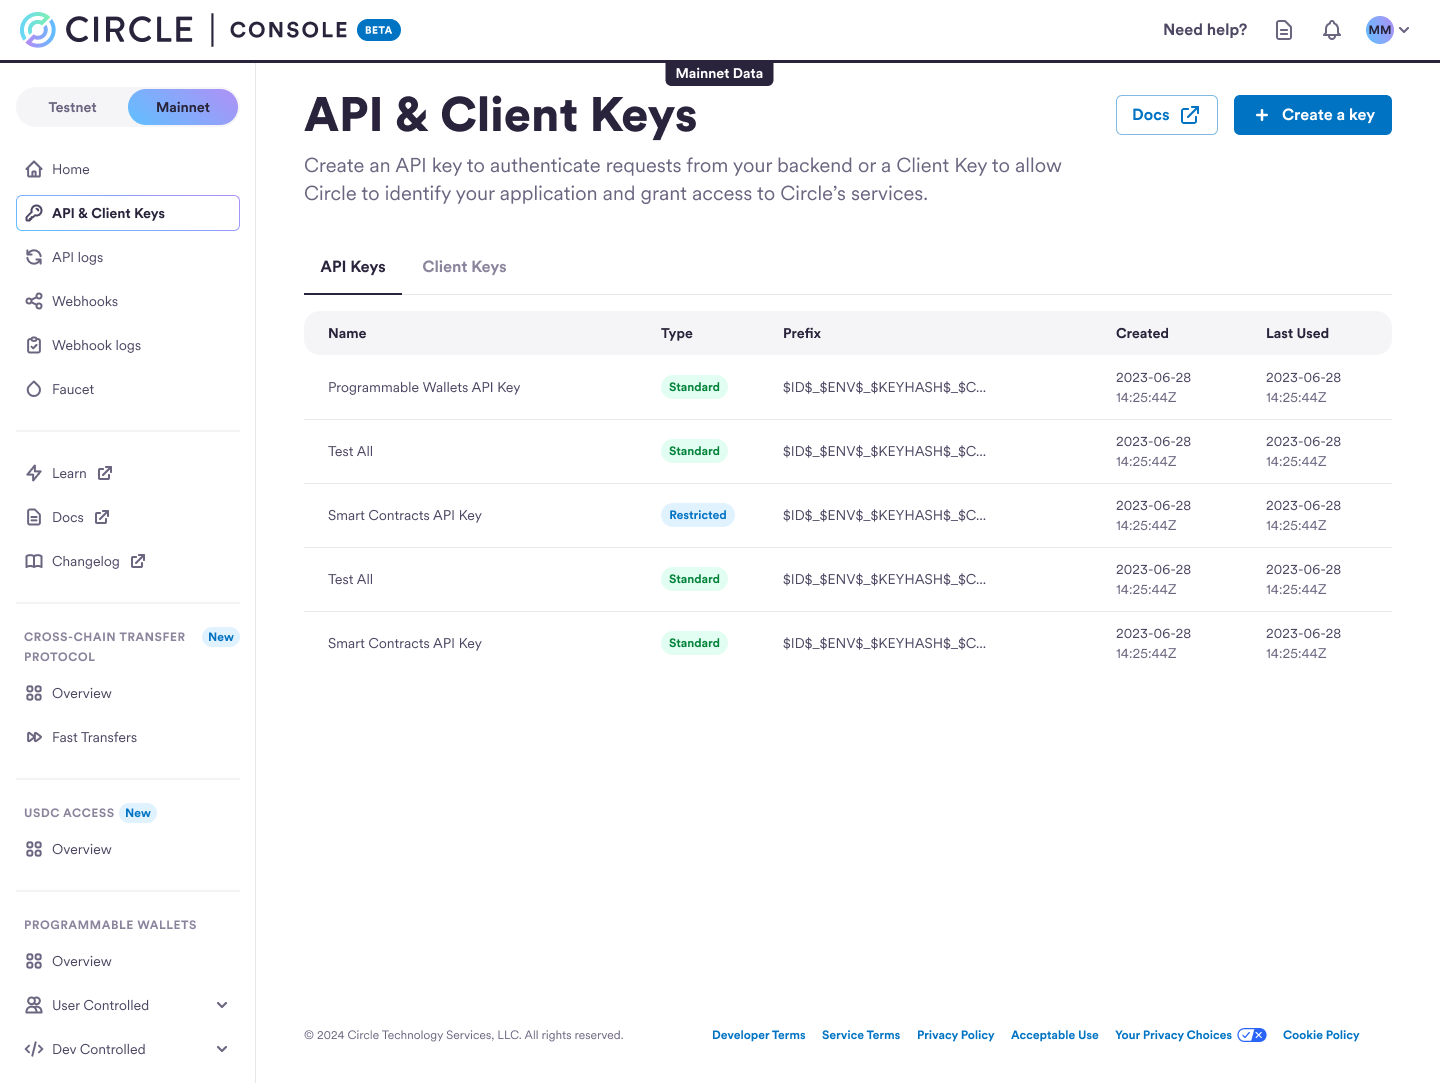
2. Navigate to **API & Client Keys** from the left sidebar and click **Create a
key**.
## Creating an API Key for Developer Services
To learn more about Circle’s API keys and authentication, refer to the guide on
[API Keys and Client Keys](/w3s/web3-services-api-client-keys-auth).
Perform the steps below to create and register an **API key** from the Circle
Developer account.
1. Sign up with your email address at:
[console.circle.com/signup](https://console.circle.com/signup)
2. Navigate to **API & Client Keys** from the left sidebar and click **Create a
key**.
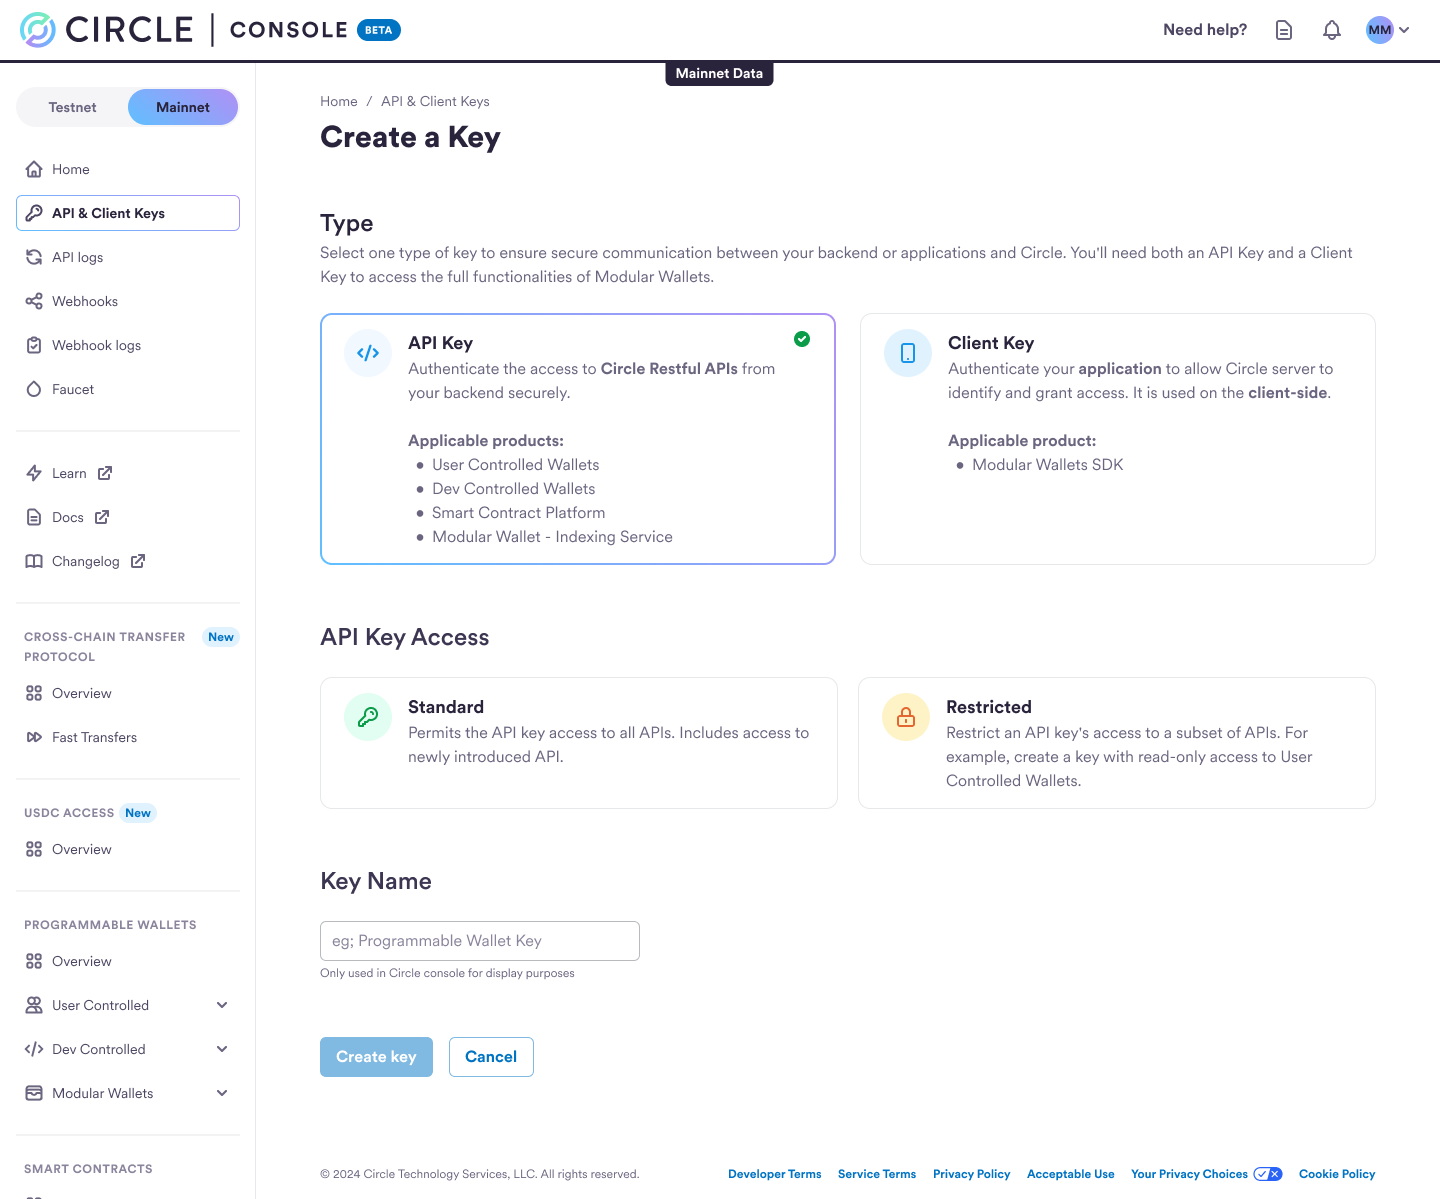
 3. Select the **API Key** option, enter the name of your API Key, and choose the
type of API Key you want to create:
* **Standard:** Permits the API key read/write to all APIs. This will also
include access to newly introduced APIs.
* **Restricted Access:** The API keys can be restricted to control their
usage and access privileges based on specific Products/Services. When
opting for restricted API keys, you can customize the permissions
associated with each key as follows:
* Select the Product/Service for which the key will have permission:
* **Webhooks:** Includes endpoints related to
[Webhook Subscription APIs](/api-reference/wallets/common/create-subscription).
* **Wallets:** Includes all endpoints for
[user-controlled wallets](/api-reference/wallets/user-controlled-wallets/create-user)
and developer-controlled wallets.
* **Contracts:** Includes endpoints related to
[Contracts](/api-reference/contracts/smart-contract-platform/import-contract).
* Furthermore, you can define the specific permissions for each
product/service assigned to the API key:
* **No permission:** The API key will not have the ability to invoke any
APIs for the specified Product/Service.
* **Read:** The API key will be granted access to read-only GET endpoints
for the specified Product/Service.
* **Read/Write:** The API key will have full access to all endpoints,
enabling both reading and writing operations for the specified
Product/Service.
3. Select the **API Key** option, enter the name of your API Key, and choose the
type of API Key you want to create:
* **Standard:** Permits the API key read/write to all APIs. This will also
include access to newly introduced APIs.
* **Restricted Access:** The API keys can be restricted to control their
usage and access privileges based on specific Products/Services. When
opting for restricted API keys, you can customize the permissions
associated with each key as follows:
* Select the Product/Service for which the key will have permission:
* **Webhooks:** Includes endpoints related to
[Webhook Subscription APIs](/api-reference/wallets/common/create-subscription).
* **Wallets:** Includes all endpoints for
[user-controlled wallets](/api-reference/wallets/user-controlled-wallets/create-user)
and developer-controlled wallets.
* **Contracts:** Includes endpoints related to
[Contracts](/api-reference/contracts/smart-contract-platform/import-contract).
* Furthermore, you can define the specific permissions for each
product/service assigned to the API key:
* **No permission:** The API key will not have the ability to invoke any
APIs for the specified Product/Service.
* **Read:** The API key will be granted access to read-only GET endpoints
for the specified Product/Service.
* **Read/Write:** The API key will have full access to all endpoints,
enabling both reading and writing operations for the specified
Product/Service.
 Tip: You may also want to add your IP address(es) or range(s) to the IP ALLOW
LIST to increase security.
4. You will receive confirmation that your API key has been generated.
5. You can click **SHOW** to see the API key details.
You’re ready to start using your **API Key** for Developer Services!
## Create a Client Key for Developer Services
To learn more about Circle’s client keys, refer to the guide on
[API Keys and Client Keys](/w3s/web3-services-api-client-keys-auth).
Perform the steps below to create and register a **Client key** from the Circle
Developer account.
1. First, ensure that you
[create an API key](#creating-an-api-key-for-developer-services) for Web3
Services.
2. Login to the [Circle Console](https://console.circle.com/), navigate to the
**API & Client Keys** section, and click **Create a key**.
Tip: You may also want to add your IP address(es) or range(s) to the IP ALLOW
LIST to increase security.
4. You will receive confirmation that your API key has been generated.
5. You can click **SHOW** to see the API key details.
You’re ready to start using your **API Key** for Developer Services!
## Create a Client Key for Developer Services
To learn more about Circle’s client keys, refer to the guide on
[API Keys and Client Keys](/w3s/web3-services-api-client-keys-auth).
Perform the steps below to create and register a **Client key** from the Circle
Developer account.
1. First, ensure that you
[create an API key](#creating-an-api-key-for-developer-services) for Web3
Services.
2. Login to the [Circle Console](https://console.circle.com/), navigate to the
**API & Client Keys** section, and click **Create a key**.
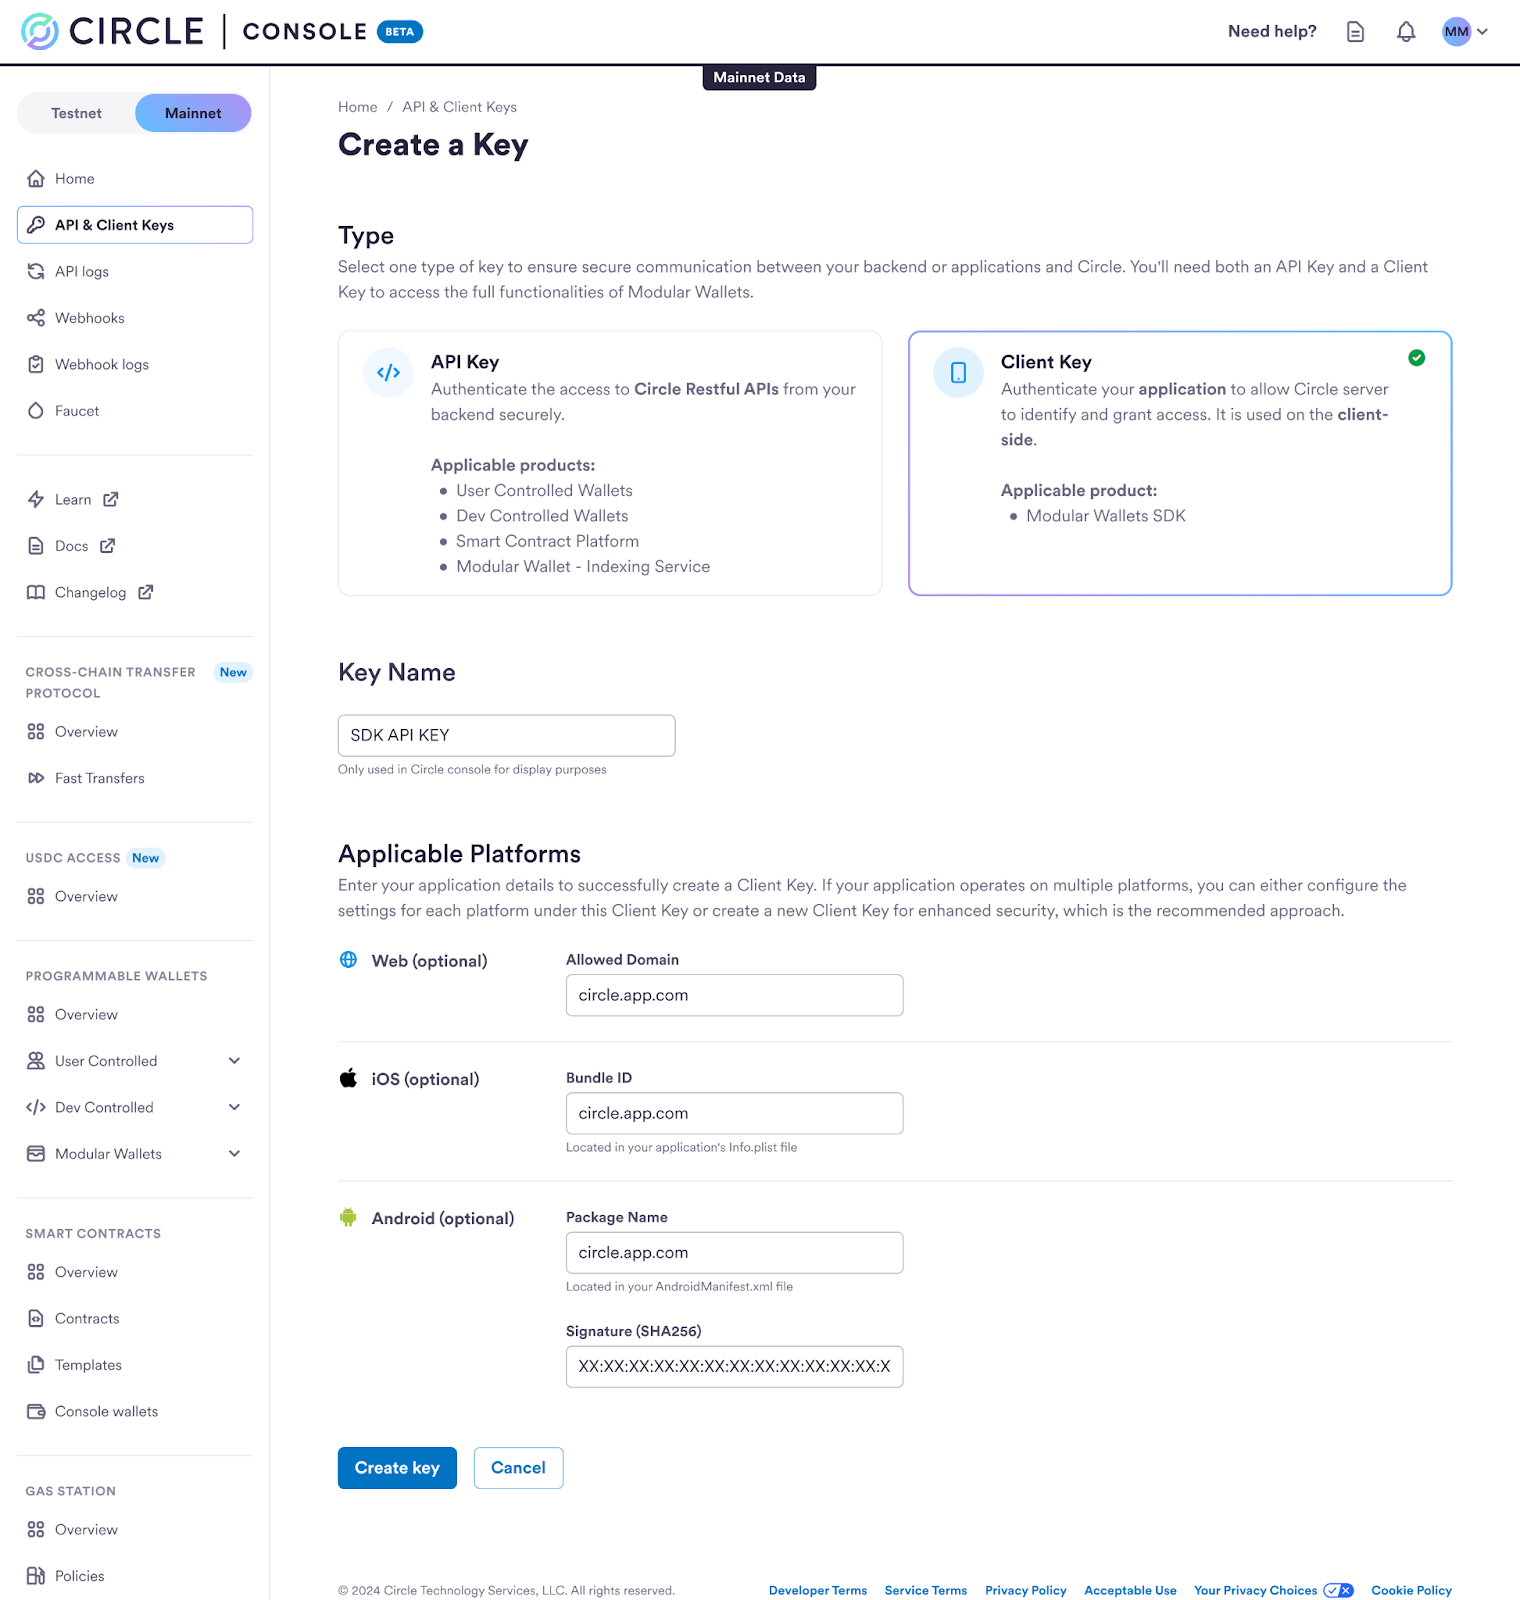
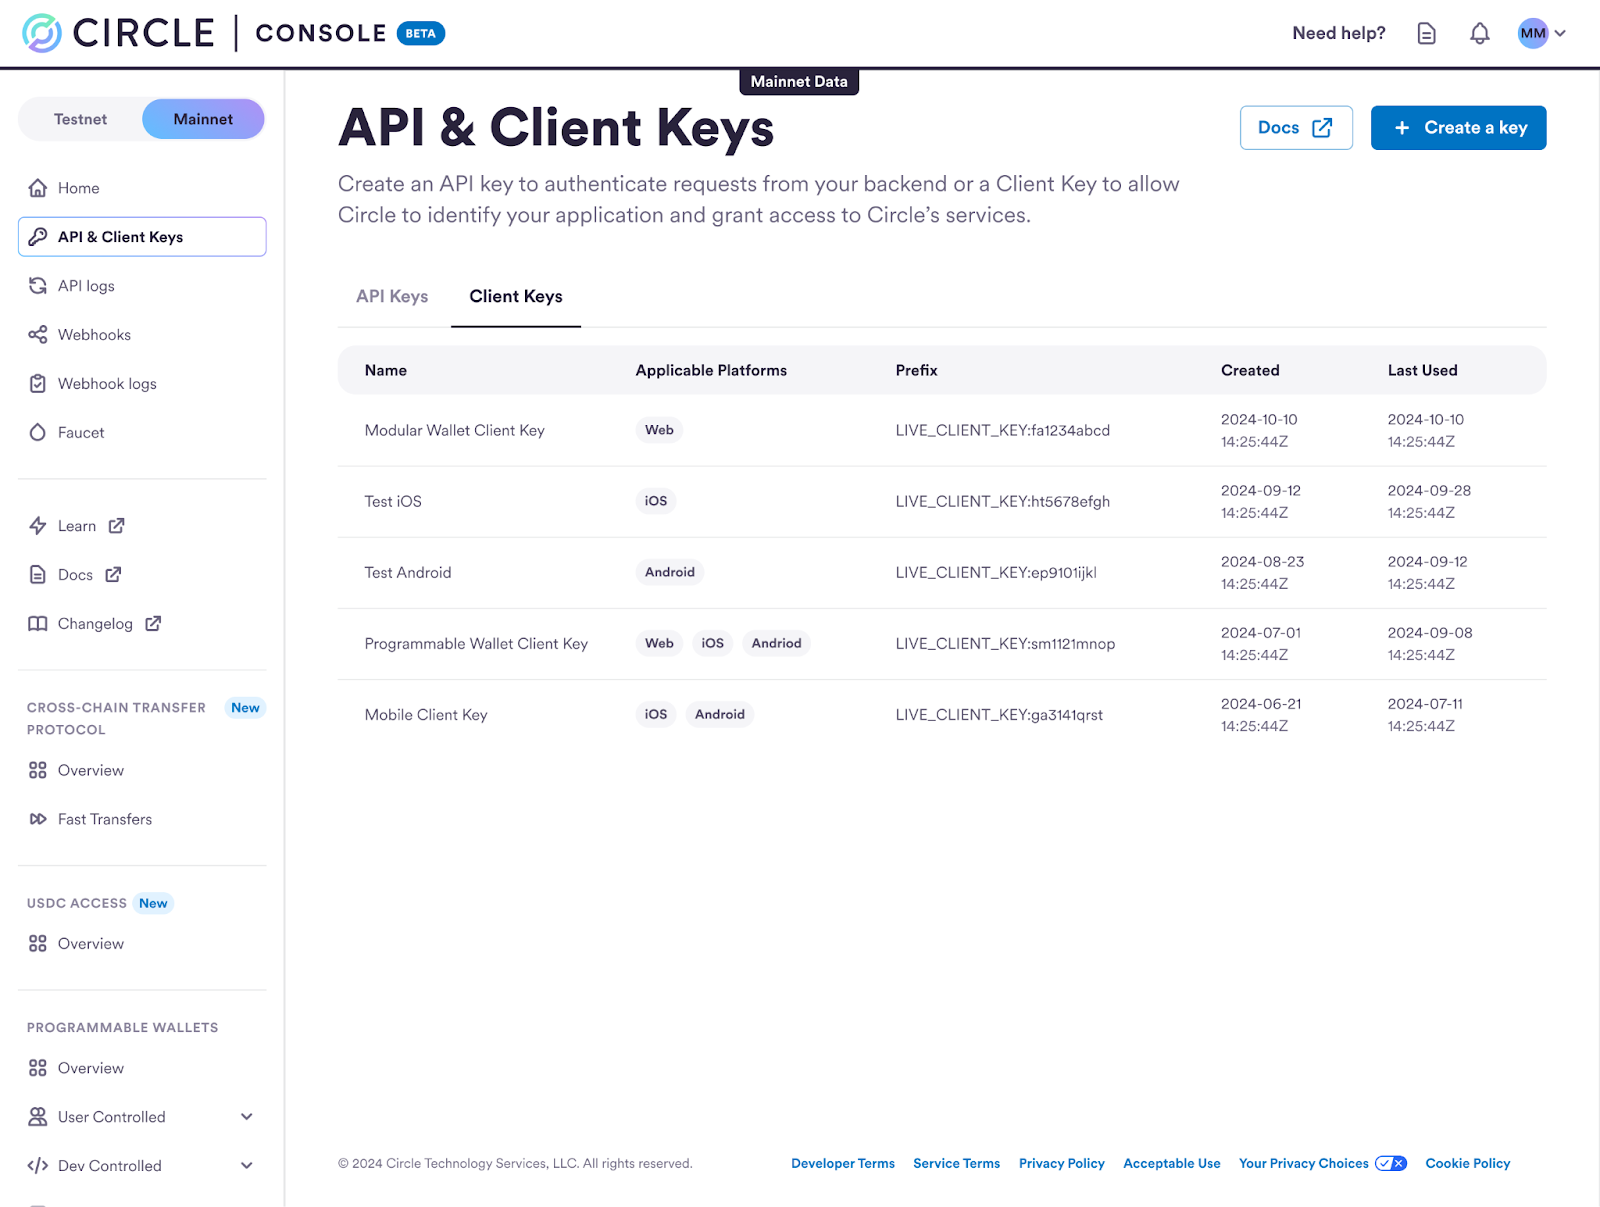 3. Select the **Client Key** option and type your client **Key Name**.
Each client key is bound to your application for identification and
authorization. Therefore, depending on your application setup, you may be able
to customize the following fields:
* Web **Allowed Domain**; for example, `your.website.com`, `localhost`, or
`chrome-extension://`
* iOS **Bundle ID**; for example, `com.yourcompany.yourapp`
* Android
* Package Name; for example, `com.yourcompany.yourapp`
* Signature (SHA256); for example, `XX:XX:…:XX` (where `X`: `[0-9A-F]`)
**Platform Settings**
1. If you run your web application locally, you can use `localhost` for the
**Allowed Domain**. If you host your web application under a domain server,
say `your.website.com`, you can use that domain server URL. For Chrome
extensions, use the extension’s URL in the format
`chrome-extension://` as the **Allowed Domain**. You can find
the extension ID on the Chrome Extensions page (`chrome://extensions`).
2. If your application runs on multiple platforms, you can either configure the
settings for each platform under such **Client Key**, or create a new
**Client Key** for enhanced security; the latter approach is recommended.
3. Select the **Client Key** option and type your client **Key Name**.
Each client key is bound to your application for identification and
authorization. Therefore, depending on your application setup, you may be able
to customize the following fields:
* Web **Allowed Domain**; for example, `your.website.com`, `localhost`, or
`chrome-extension://`
* iOS **Bundle ID**; for example, `com.yourcompany.yourapp`
* Android
* Package Name; for example, `com.yourcompany.yourapp`
* Signature (SHA256); for example, `XX:XX:…:XX` (where `X`: `[0-9A-F]`)
**Platform Settings**
1. If you run your web application locally, you can use `localhost` for the
**Allowed Domain**. If you host your web application under a domain server,
say `your.website.com`, you can use that domain server URL. For Chrome
extensions, use the extension’s URL in the format
`chrome-extension://` as the **Allowed Domain**. You can find
the extension ID on the Chrome Extensions page (`chrome://extensions`).
2. If your application runs on multiple platforms, you can either configure the
settings for each platform under such **Client Key**, or create a new
**Client Key** for enhanced security; the latter approach is recommended.
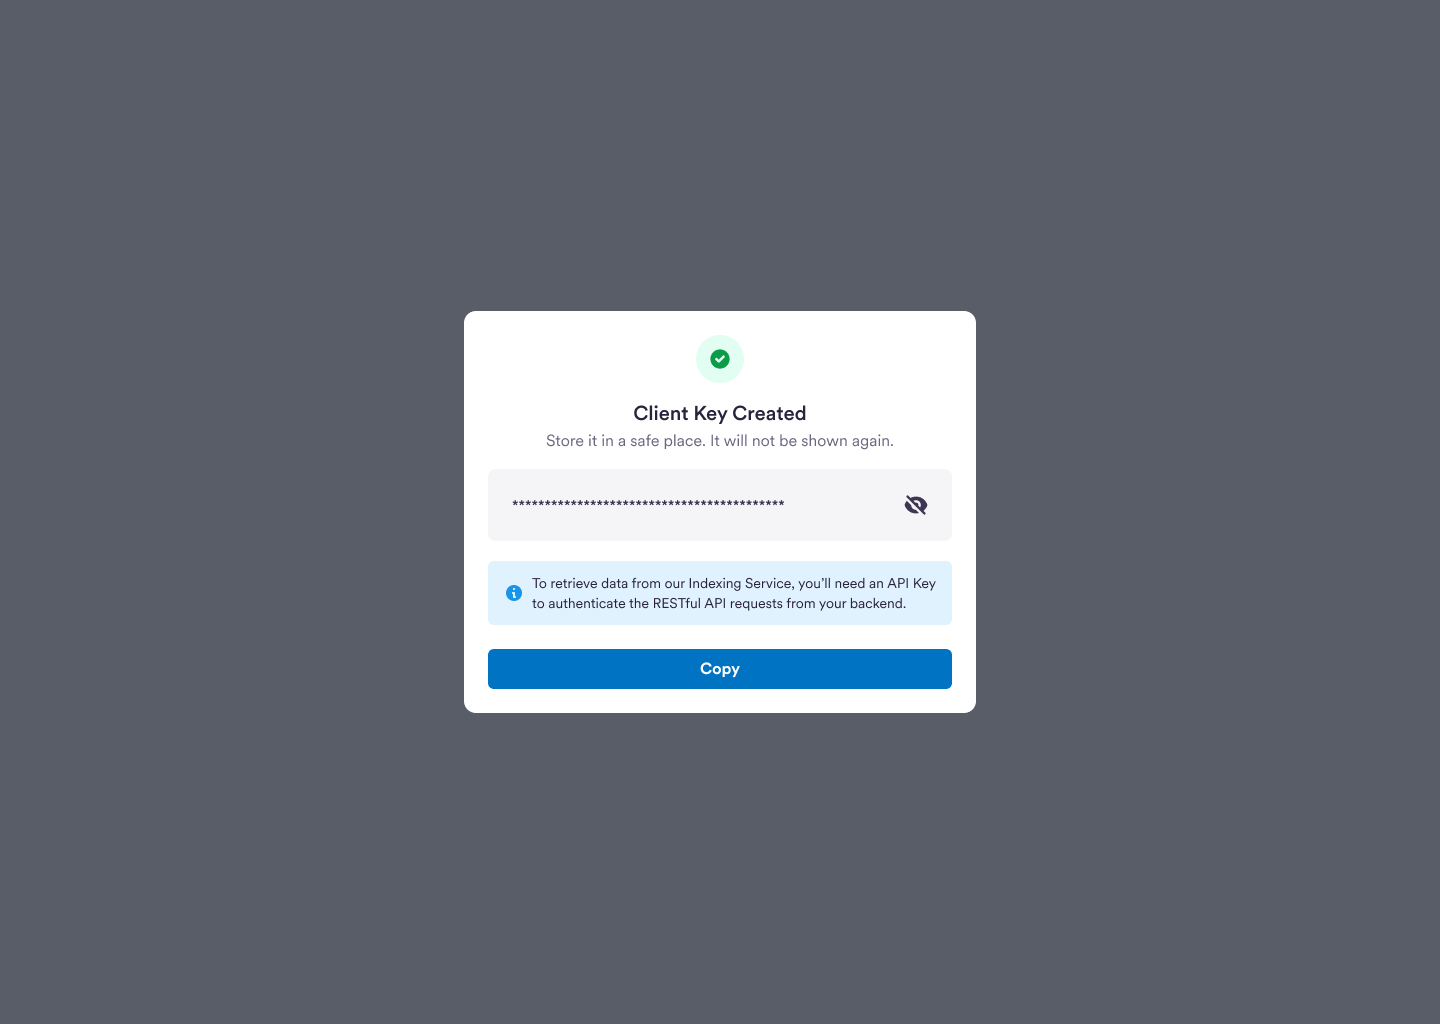
 4. Verify that the **Client Key** was created.
Once the information provided in the previous steps is validated, the system
generates a client key. Please store it in a safe place, as it won't be
displayed on the Console again.
4. Verify that the **Client Key** was created.
Once the information provided in the previous steps is validated, the system
generates a client key. Please store it in a safe place, as it won't be
displayed on the Console again.
 You’re ready to start using your **Client Key** for Developer Services!