> ## Documentation Index
> Fetch the complete documentation index at: https://circle-devdocs-test-ai-codegen-component.mintlify.site/llms.txt
> Use this file to discover all available pages before exploring further.
# Get Started
export const GridItem = ({children, image, caption}) => {
if (image) {
return ;
}
return ;
};
export const Grid = ({children}) => {
return
{children}
;
};
export const FeatureItem = ({title, icon, iconColor = '#1061a6', children, iconSize = 20, iconType = 'regular', href}) => {
const titleContent = href ?
{title}
: title;
return
{titleContent}
{children}
;
};
export const FeatureGrid = ({children, cols = 2, backgroundColor}) => {
const columns = cols === 1 ? 1 : 2;
return ;
};
## Create a Developer Services account
To access the Developer Services Console, sign up with your email address. Our
pay-as-you-grow pricing model eliminates upfront fees and contract negotiations,
starting at a low cost per wallet. The pricing scales as your user base expands.
To access **Set up your account** on Circle's Developer Services Console.
Create an account on Circle's Developer Services Console.
## Understanding Testnet vs Mainnet environments
Testnet is akin to a training ground for developers. It's a simulated
environment where you can develop, test, and polish your applications with
confidence. In this space, you can execute transactions and test various
scenarios without any financial implications, as Testnet does not involve
real cryptocurrencies or assets.
Mainnet is where everything goes live. This network handles actual
transactions with genuine digital currencies. Operating on Mainnet means
dealing with real-world consequences and genuine assets. The results of
actions performed here are immediate and impactful.
Before jumping into Mainnet, it is crucial to rigorously test and validate your
applications within the Testnet environment first. This precaution ensures that
all systems and functionalities operate correctly before you transition to a
live environment. Once you have thoroughly vetted your application in Testnet,
you can migrate to Mainnet operations.
In our quickstarts, we use Testnet to guarantee a secure learning experience.
Your Testnet API key serves as the gateway to this development.
## Create your API key
Generate a standard API key:
Use your login details to log in to the Circle Developer Services console.
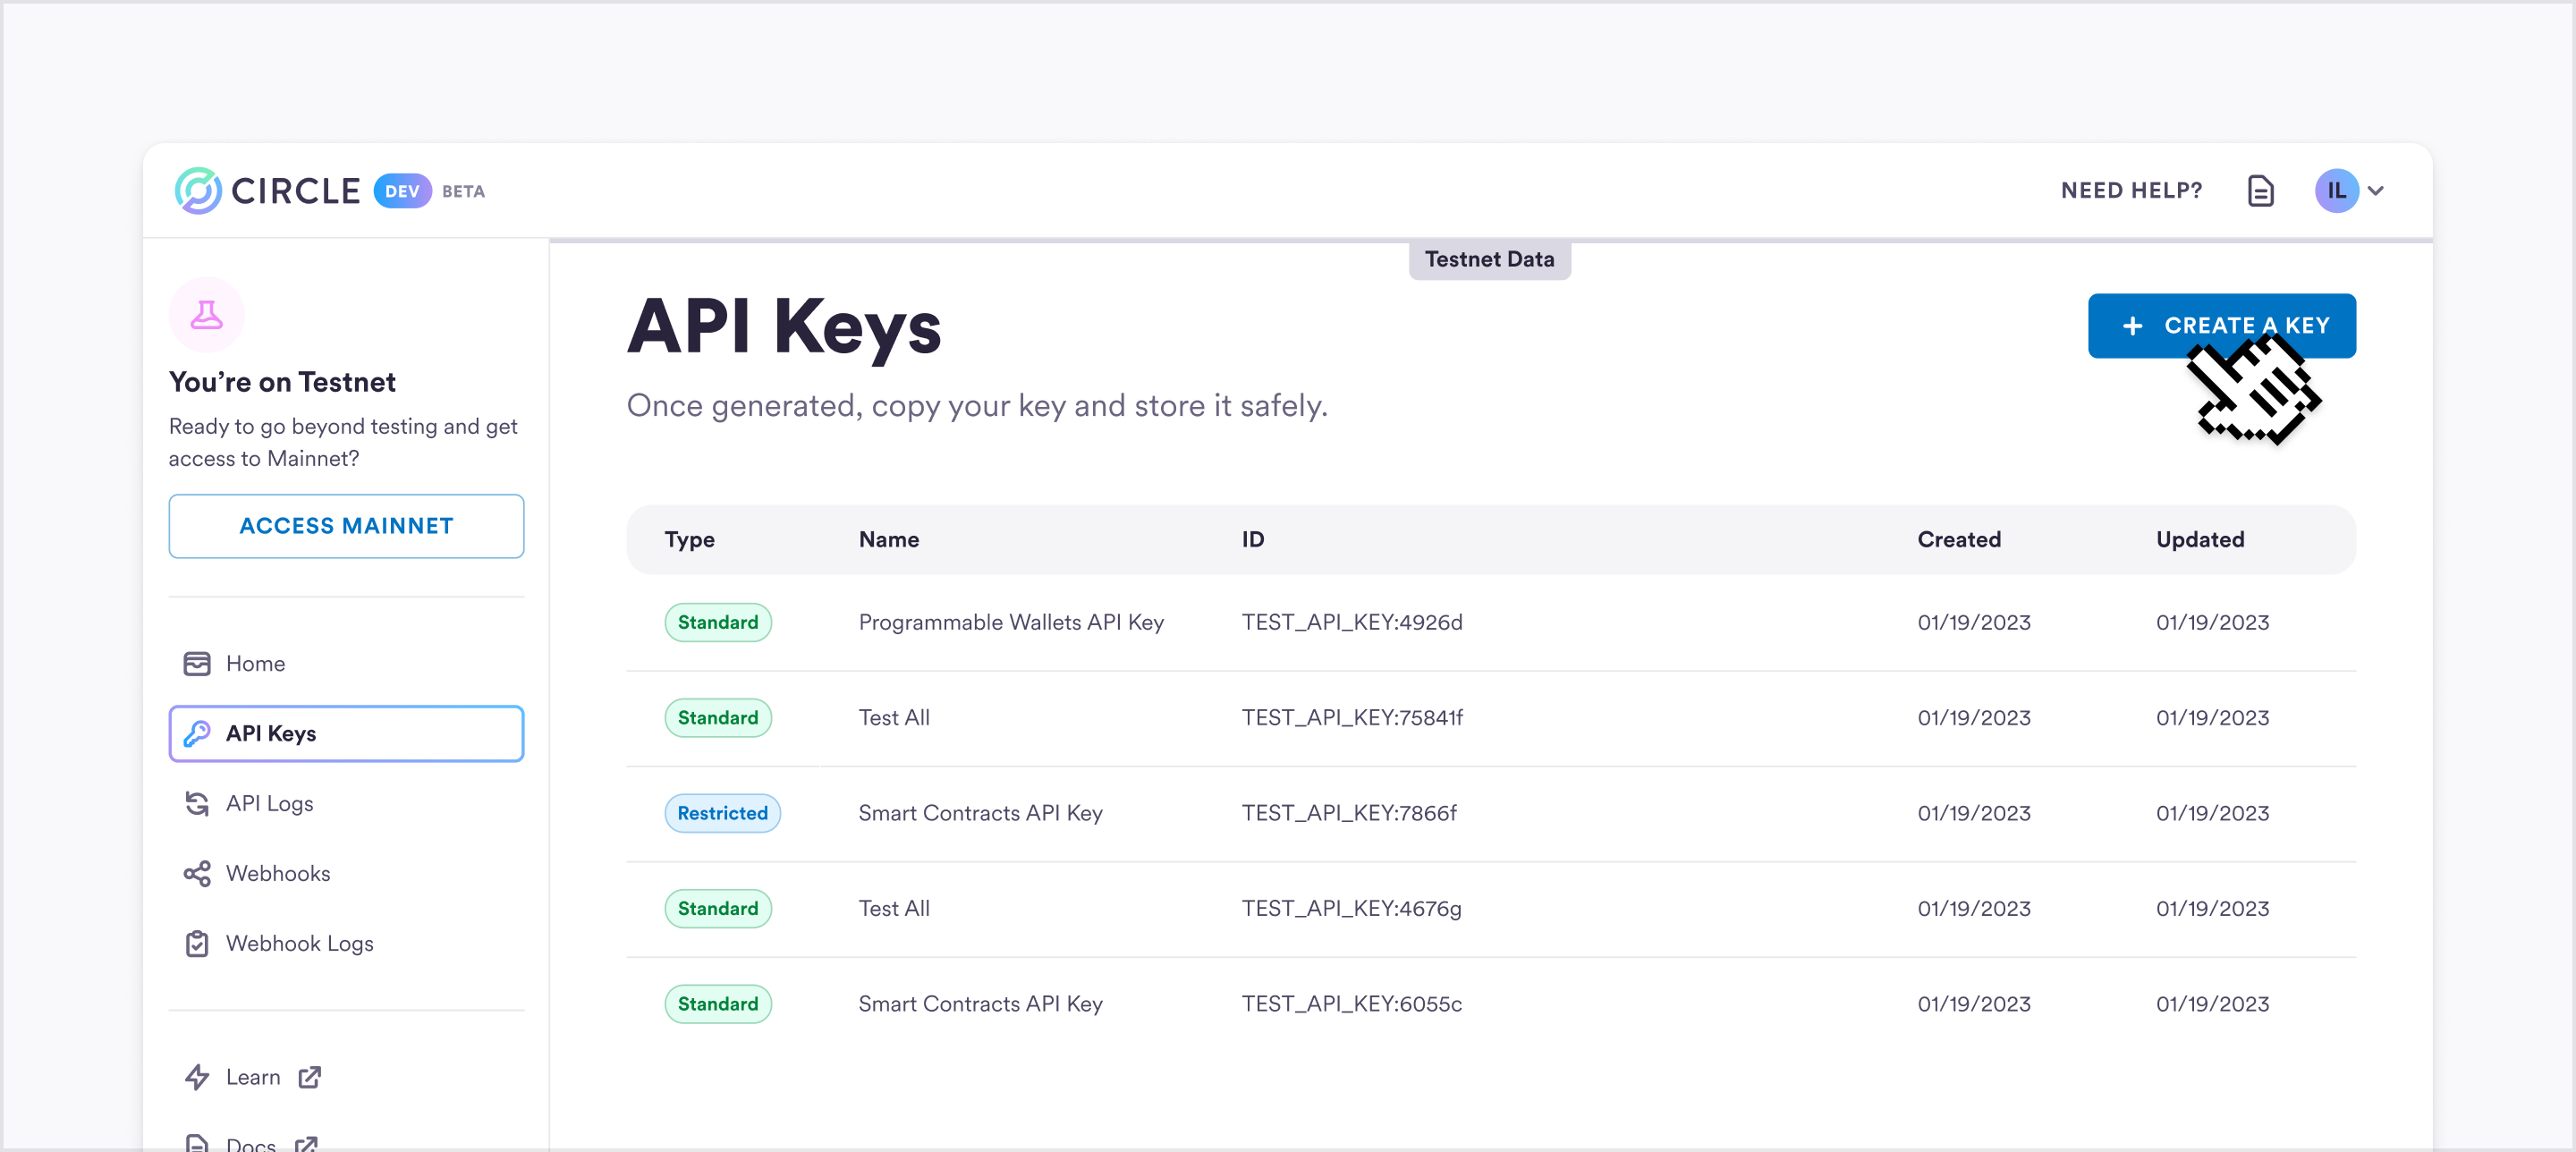
On the left hand nav, select the [API Keys](/api-keys) page, and then select **CREATE A KEY**.
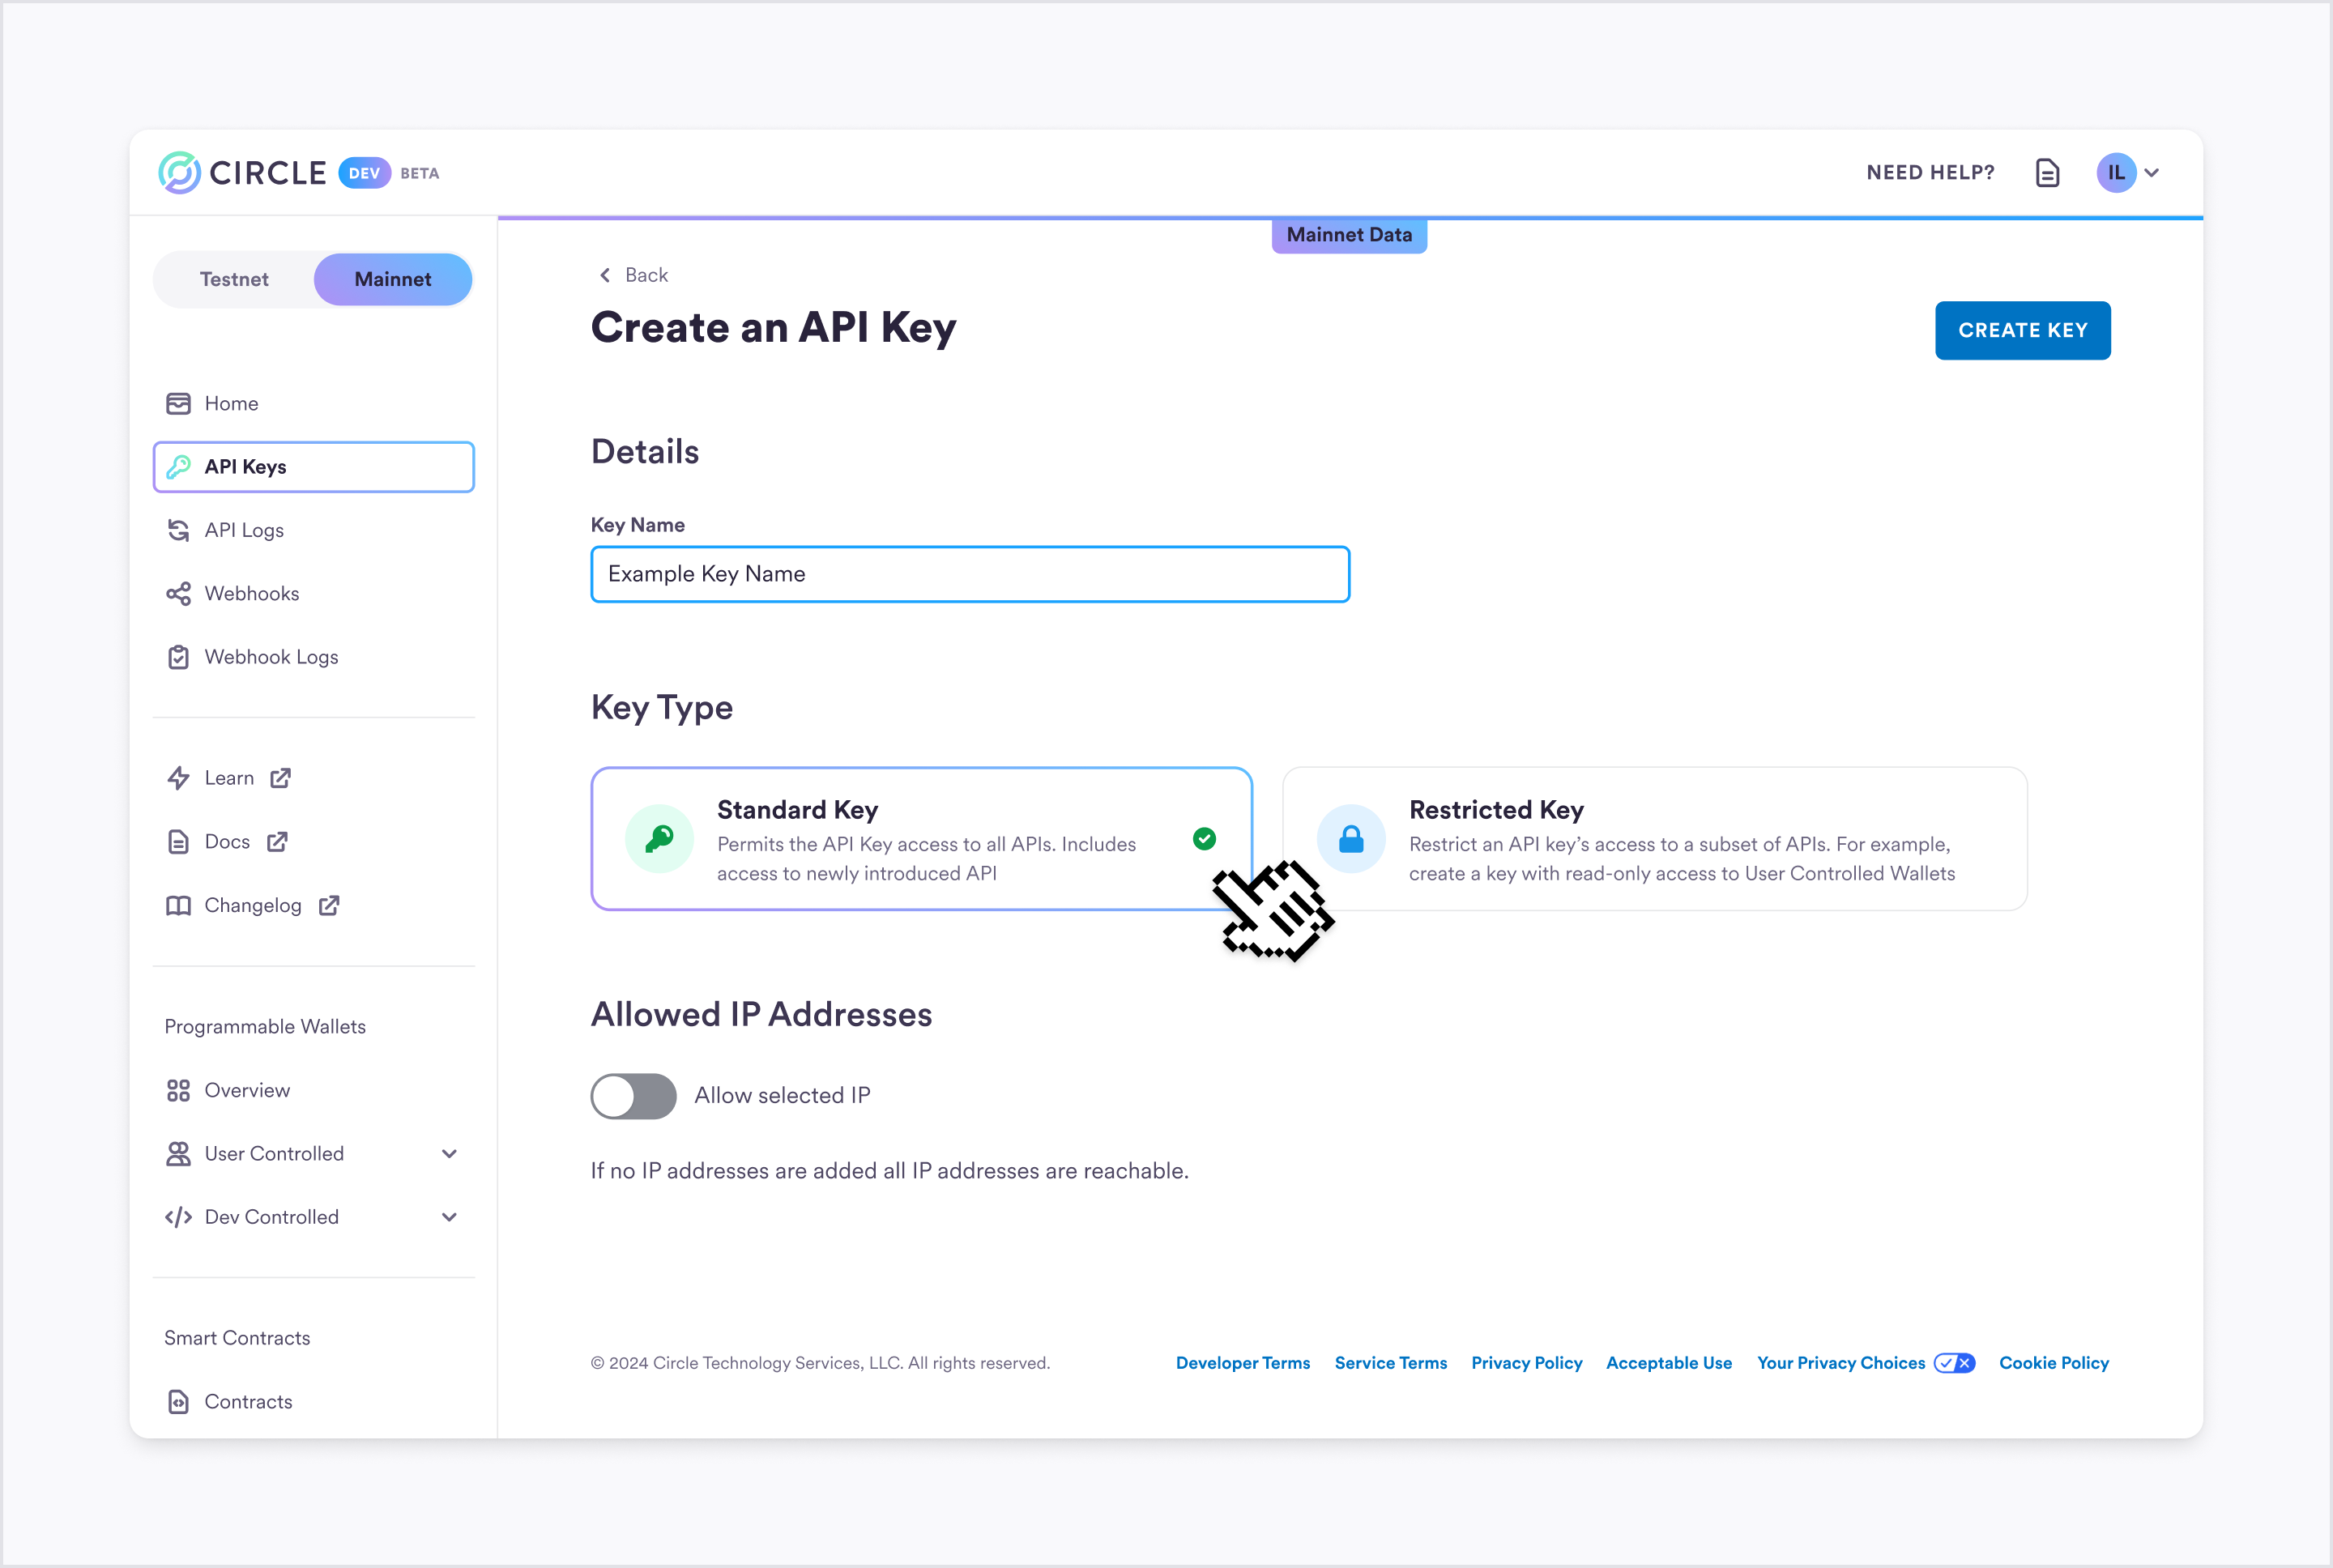
 On the **Create an API Key** page, enter a name for your API key, and then select **Standard Key**.
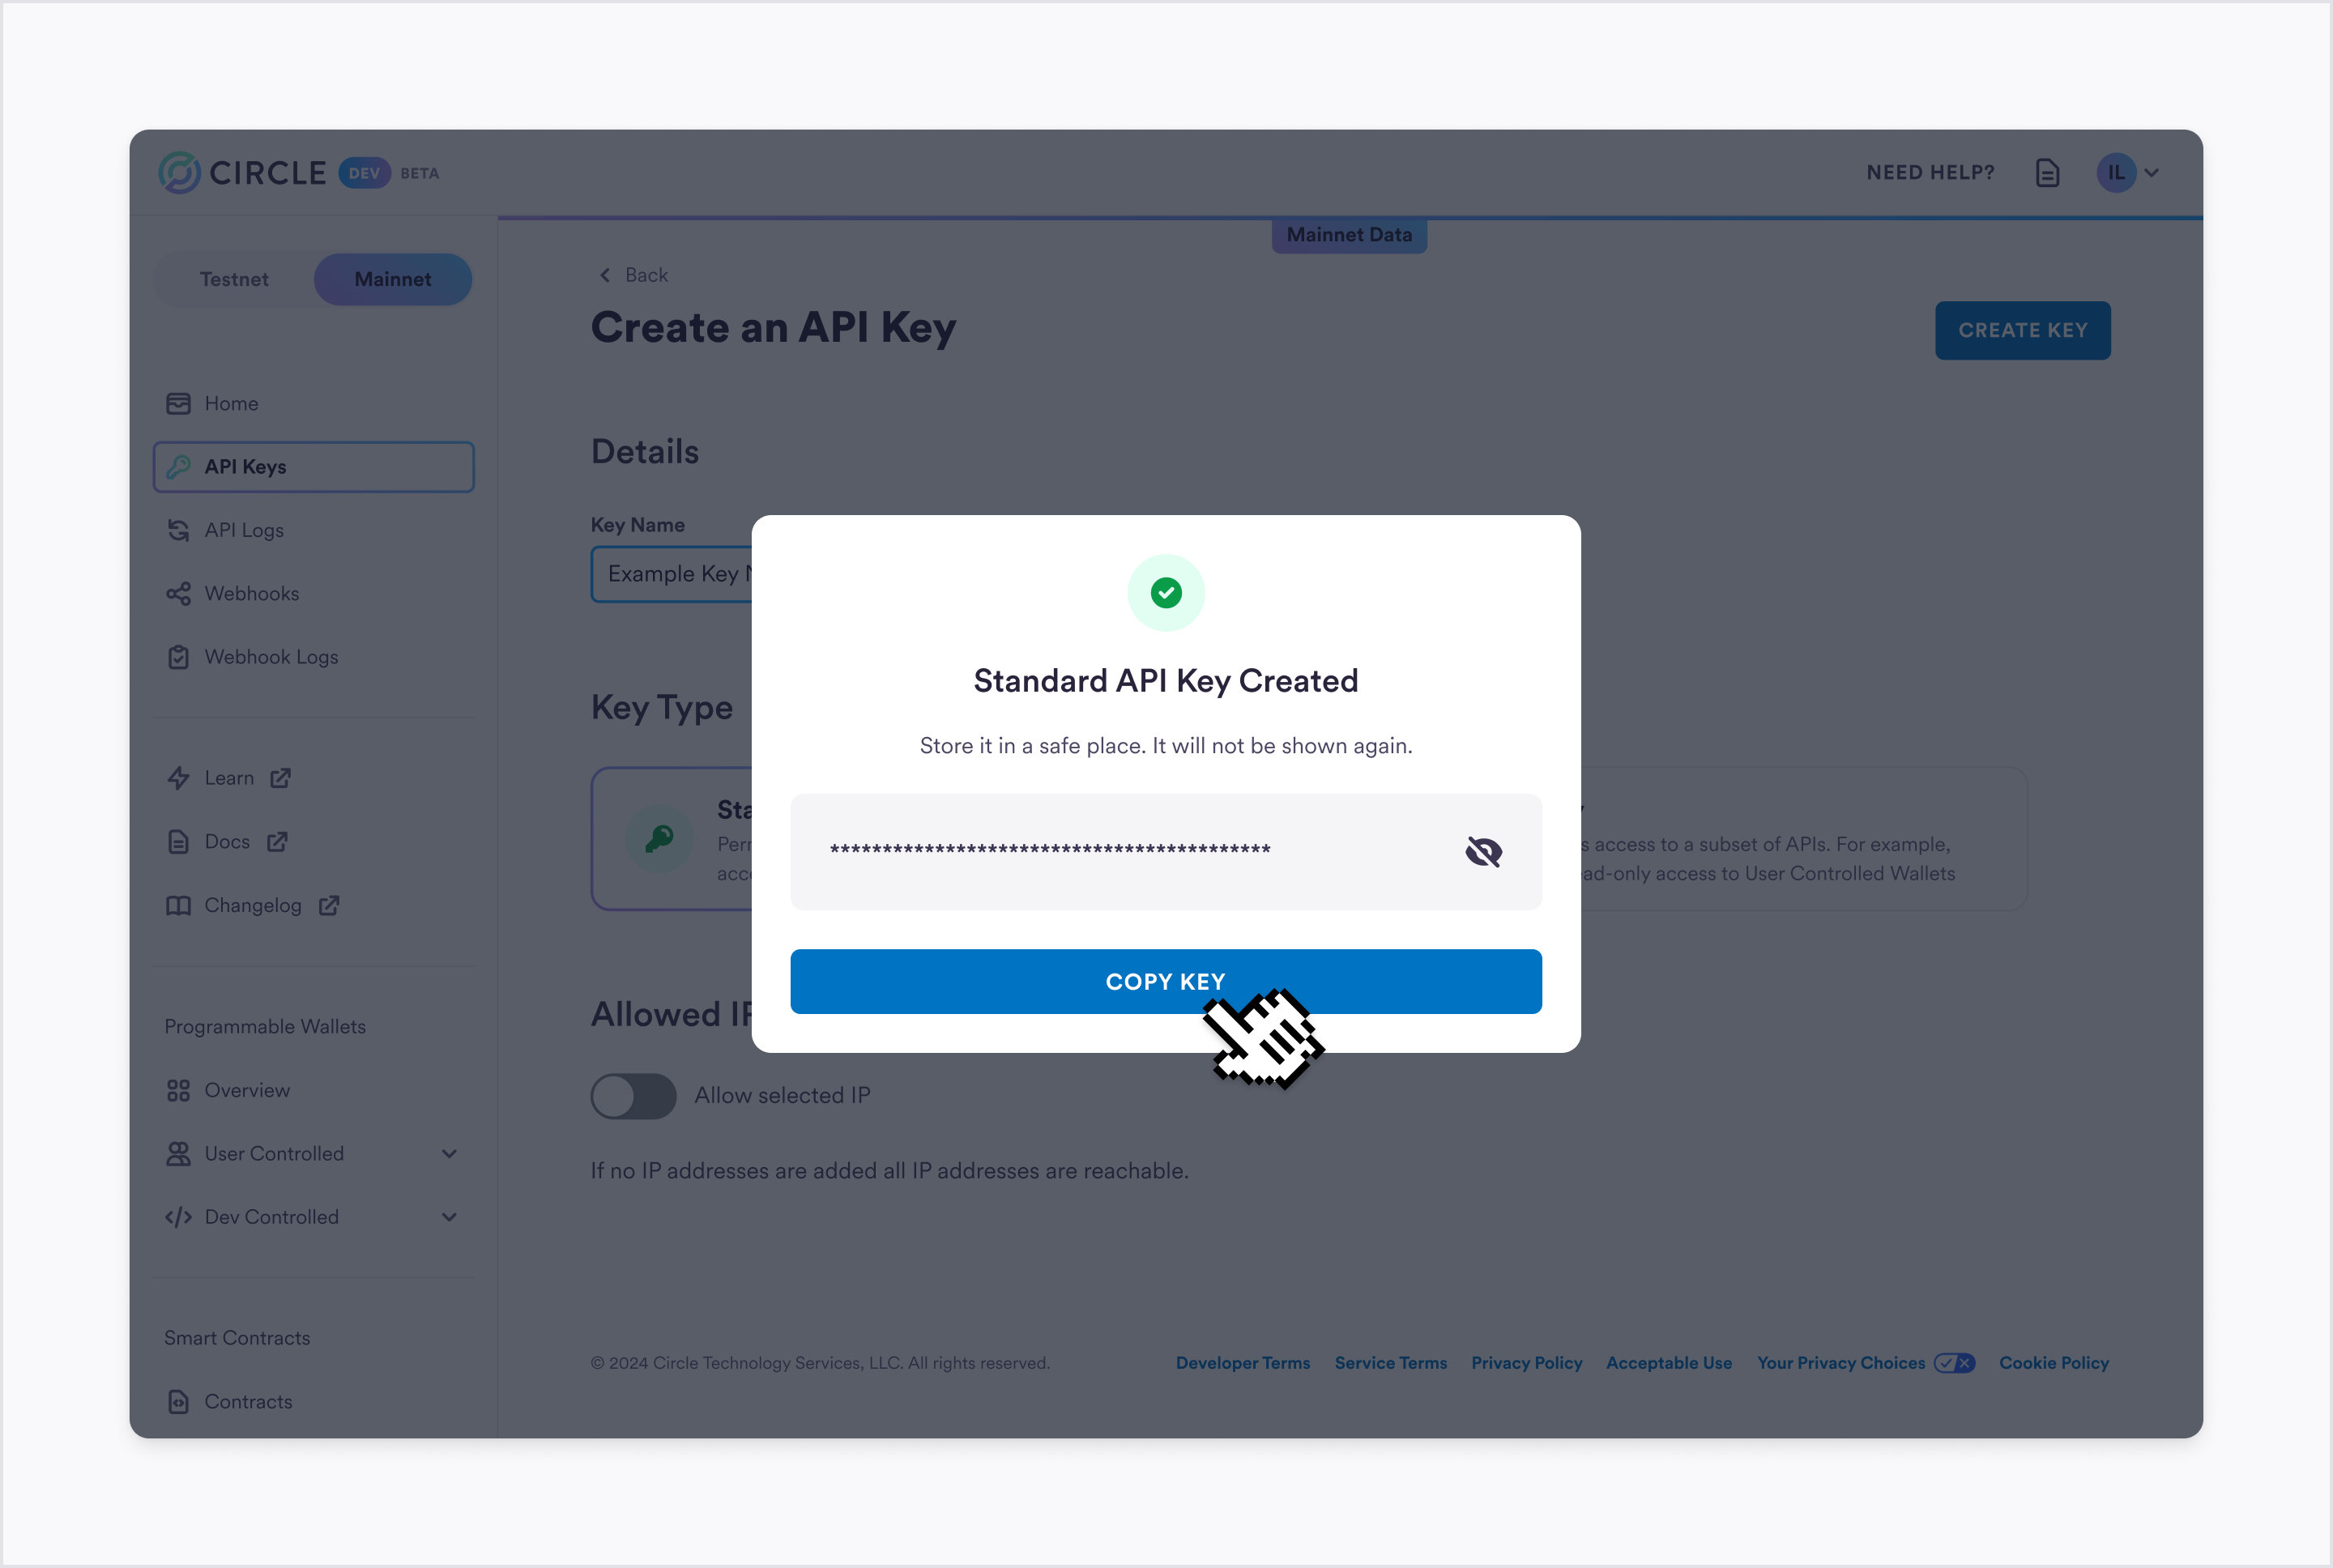
 The console displays your key only once after you create it. Make sure to copy the key value and store it in a secure location. You can't retrieve the key value after you close the dialog. If you lose it, you need to create another key. Never share your key with anyone.
 ## The power of Testnet
Engage in robust testing of your applications, smart contracts, and other
blockchain innovations within a safe environment that simulates real-world
operations. This sandbox allows for trial and error without any financial
stakes, so mistakes carry no monetary risk.
Testnet serves as a preparatory platform for launches on various
blockchains. Whether your focus is on Ethereum, Polygon, or Avalanche,
Testnet provides insights into how your applications will perform across
different ecosystems.
The Testnet environment is the perfect place to brainstorm and develop new
blockchain solutions. Here, you have the license to push boundaries and
explore various possibilities without financial constraints.
Benefit from the ability to quickly refine your projects based on
immediate feedback and test insights. The adaptable nature of Testnet
supports rapid prototyping and swift iteration, which can lead to faster
advancements and better outcomes in your development cycle.
**Next: Explore our Quickstarts**
Will show you how to set up custodial wallets by establishing your entity secret and how to initiate a transaction.
Learn how to set up non-custodial wallets for your end-users and initiate a transfer for them.
Walkthrough of using the Cross-Chain Transfer Protocol (CCTP) with Circle Wallets, which allows you to bridge USDC across Blockchains.
[Developer Services](/): Bring any
web or mobile app on-chain. Integrate or create wallets with composable APIs and
SDKs.
[Stablecoin Protocols](/stablecoins/what-is-usdc): Move USDC securely across
blockchains for seamless user onboarding, on-demand treasury rebalancing, and
more. Live on 8 blockchains.
## The power of Testnet
Engage in robust testing of your applications, smart contracts, and other
blockchain innovations within a safe environment that simulates real-world
operations. This sandbox allows for trial and error without any financial
stakes, so mistakes carry no monetary risk.
Testnet serves as a preparatory platform for launches on various
blockchains. Whether your focus is on Ethereum, Polygon, or Avalanche,
Testnet provides insights into how your applications will perform across
different ecosystems.
The Testnet environment is the perfect place to brainstorm and develop new
blockchain solutions. Here, you have the license to push boundaries and
explore various possibilities without financial constraints.
Benefit from the ability to quickly refine your projects based on
immediate feedback and test insights. The adaptable nature of Testnet
supports rapid prototyping and swift iteration, which can lead to faster
advancements and better outcomes in your development cycle.
**Next: Explore our Quickstarts**
Will show you how to set up custodial wallets by establishing your entity secret and how to initiate a transaction.
Learn how to set up non-custodial wallets for your end-users and initiate a transfer for them.
Walkthrough of using the Cross-Chain Transfer Protocol (CCTP) with Circle Wallets, which allows you to bridge USDC across Blockchains.
[Developer Services](/): Bring any
web or mobile app on-chain. Integrate or create wallets with composable APIs and
SDKs.
[Stablecoin Protocols](/stablecoins/what-is-usdc): Move USDC securely across
blockchains for seamless user onboarding, on-demand treasury rebalancing, and
more. Live on 8 blockchains.